Faded or yellowsed headlights can reduce nighttime visibility and curb appeal. This guide outlines a practical, step-by-step method to restore clarity using common DIY tools and affordable products. The process emphasizes safe handling and durable results, so drivers can see better without rushing through repairs.
Quick Answer
Clean faded headlights by sanding the lens, applying a polishing compound, and sealing with UV coating to protect the plastic. Use a drill-powered polishing kit for even results, and finish with a microfiber towel for a smooth, clear surface.
What You’ll Need
- Headlight restoration kit polishing compound drill attachment
- 3-step headlight restoration kit sanding discs compound polish
- Headlight lens sealant UV coating for plastic headlights
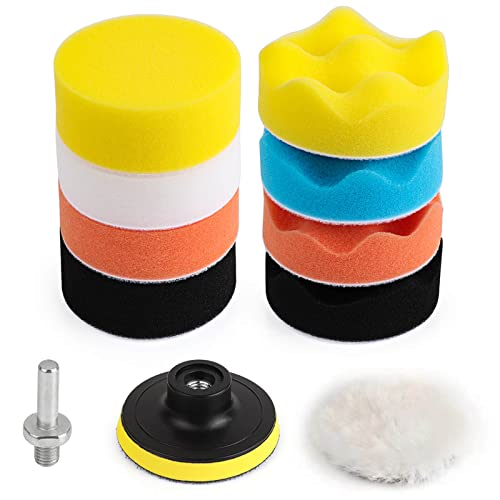
- Drill-powered headlight polishing kit with backing pad
- Microfiber towel kit masking tape for headlight restoration


Before You Start
Assess the headlights for deep cracking or pitting. If lenses are severely damaged, restoration may be limited, or replacement might be necessary. Work in a shaded, well-ventilated area and protect the surrounding paint with masking tape.
Safety cautions: wear eye protection and a dust mask when sanding. Keep a damp cloth handy to wipe residue and prevent overheating the plastic surface.
Step-By-Step: How To Clean Faded Headlights
- Protect the area around the headlights with masking tape and clean the lens surface with a damp microfiber cloth to remove dirt.
- Attach the sanding discs to the drill-powered headlight polishing kit with backing pad following the kit instructions.
- Begin with the lowest grit disc and run the drill at a slow speed. Apply light, even pressure while moving in straight lines across the lens.
- Progress through the grit sequence specified in the kit (e.g., 800, 1200, 2000) to gradually remove oxidation and surface scratches.
- Wipe the lens clean after each grit step to monitor progress and avoid creating new scratches.
- Apply a polishing compound from the headlight restoration kit and buff in circular motions until the lens looks clear, using a clean microfiber cloth.
- Rinse and dry the lens, then inspect for any remaining haze. Repeat polishing if needed, but avoid over-polishing which can thin the plastic.
- Apply the UV coating or sealant to protect against future yellowing. Follow the product’s cure time and apply a second coat if recommended.
- Wipe away any excess sealant and let it cure per the manufacturer’s instructions before driving.
- Remove masking tape and do a final wipe-down with a dry microfiber towel to finish.
- Test night visibility by turning on the lights in a dark area and checking for improved clarity. If needed, perform a light touch-up or reapplication of sealant after a few weeks.
Troubleshooting
| Symptom | Likely Cause | Fix | Prevention |
|---|---|---|---|
| Haze remains after polishing | Insufficient grit progression or surface still oxidized | Retry with a finer grit sequence and ensure consistent speed | Follow kit steps precisely; avoid skipping grits |
| Scratches appear after polishing | Excessive pressure or high speed | Reduce pressure, slow the drill, and pause to cool the lens | Use light, even strokes and a backing pad |
| Sealant not curing | Humidity or incorrect prep | Wipe surface clean and apply in a dry, moderate environment | Follow curing times and store products properly |
| Patchy transparency | Uneven compound application | Reapply small amount and buff evenly | Use fresh microfiber for each pass |
Common Mistakes
- Over-sanding or using too aggressive grit for long periods
- Skipping steps or rushing the drying and curing phases
- Neglecting to protect surrounding paint with masking tape
- Not cleaning residue between steps, leading to scratches
Careful adherence to the process helps avoid common pitfalls and yields clearer, longer-lasting headlights.
Tips For Best Results
- Work in a shaded area to prevent rapid drying and heat buildup
- Keep the lens surface consistently wet during sanding to minimize friction
- Use a dedicated backing pad to improve even pressure and finish
- Choose a UV coating with a long-lasting resistance to sunlight and road grime
- Periodic maintenance with a light cleaning and reapplication of sealant can extend clarity
Call A Professional
Consider a pro if there are deep cracks, yellowing beyond the surface, or if the DIY approach does not yield satisfactory clarity. Stop and seek expert help if the lens shows structural damage, adhesive residue around the seal, or if you notice moisture buildup inside the headlight assembly.
FAQ
Will a DIY headlight restoration kit work on all plastic headlights?
Most plastic headlight lenses respond well to restoration, but very faded or heavily scratched lenses may require professional resurfacing or replacement.
How long do results typically last after sealant application?
Sealants generally provide protection for several months, with longevity depending on exposure to sun, weather, and road conditions.
Can I use household polishing products instead of a dedicated kit?
Household products are not recommended; dedicated headlight kits are designed for safe abrasion and proper curing on automotive plastics.
Is it necessary to remove the headlight assembly to restore it?
In many cases, restoration can be done in place, but removing the assembly can improve access and yield a more thorough result.
Buying Guide
Choosing the right kit and accessories affects ease, durability, and final clarity. Consider the following factors to compare options effectively.
- Size and scope: Some kits include multiple sanding discs, a polishing compound, and sealant; others focus on a single-step approach. Match the kit to your repair scope and vehicle model.
- Noise level and ease of use: Drills vary in torque and noise. A kit with a dedicated backing pad helps control vibration and achieve consistent results.
- Energy efficiency: Electric tools with variable speed control save energy and reduce the risk of overheating the lens.
- Controls and safety features: Look for ergonomic handles, splash guards, and clear instructions to minimize errors.
- Placement and compatibility: Ensure the drill attachment fits your drill chuck size and can be used safely on automotive plastics.
When planning a restoration project, consider having a complete set described in the items above, including the polishing compound, sanding discs, UV sealant, and a microfiber towel kit. A structured kit can simplify the process and help achieve longer-lasting clarity.