Spider plants are popular houseplants known for their air-purifying qualities and easy care. Brown tips on the leaves can be caused by watering issues, low humidity, or nutrient imbalances. This guide outlines practical steps to diagnose and fix the problem, helping spider plants maintain lush, green foliage with minimal effort.
Quick Answer
Assess watering habits and ensure consistent moisture without overwatering. Improve humidity around the plant and trim damaged leaf tips with clean tools. Regularly monitor soil moisture and temperature to prevent future brown tips.
What You’ll Need
The following tools and materials help address brown tips on spider plants while supporting overall plant health.
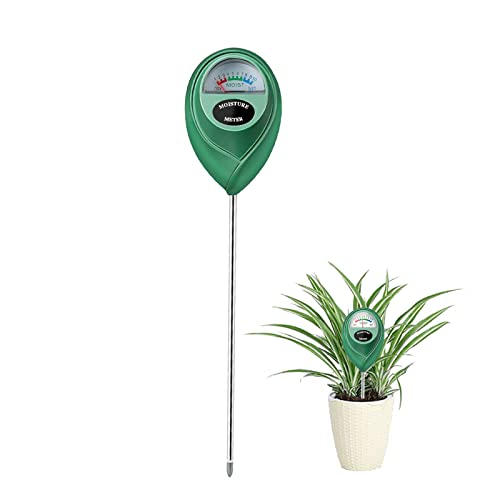
- Digital soil moisture meter for potted plants
- Stainless steel pruning shears 6 inch for indoor plants
- Watering can with long spout for houseplants
- Full spectrum LED grow light 6500K for houseplants
- Hygrometer with humidity for indoor plant care


Before You Start
Before making changes, observe the plant’s overall condition: leaf color, new growth, and pot drainage. Always sanitize pruning tools before cutting to prevent disease. Check the pot is well-draining and that the soil isn’t compacted. Time estimate: 20–40 minutes for initial assessment and first corrective steps.
Step-By-Step: How To Address Brown Tips On Spider Plants
- Inspect watering routine and measure soil moisture with the digital soil moisture meter. Water only when the top 1–2 inches of soil are dry.
- Adjust watering technique using the watering can with long spout to reach the root zone without over-saturating the pot.
- Test ambient humidity with a hygrometer. If RH < 40%, increase humidity around the plant using a tray of water with pebbles or a humidifier near the display area.
- Trim off brown tips with sterile stainless steel pruning shears, cutting just above the healthy green tissue to encourage new growth.
- Repot if soil is compacted or roots appear crowded. Use a well-draining potting mix suitable for houseplants.
- Place the plant under a full spectrum LED grow light (6500K) for 6–8 hours daily if natural light is insufficient, especially in darker rooms.
- Check fertilizer schedule and avoid overfertilizing. If using fertilizer, dilute to half-strength and apply only during the growing season.
- Ensure the pot has drainage holes and that excess water is not standing in the saucer after watering.
- During the next 2–3 weeks, monitor new leaf growth for signs of recovery. Maintain consistent light, water, and humidity levels.
- Keep a routine check with the digital moisture meter to prevent both dry soil and waterlogged roots.
- If browning recurs, reassess for pests or diseases and consider discarding severely damaged leaves to prevent spread.
- Document changes (watering times, humidity, light exposure) to identify which factor most helps your plant.
Troubleshooting
| Symptom | Likely Cause | Fix | Prevention |
|---|---|---|---|
| Brown tips recur after watering | Inconsistent watering or salty fertilizer buildup | Flush soil with plain water; dilute or reduce fertilizer | Follow a regular, moderate feeding schedule |
| Leaves brown at tips but green elsewhere | Low humidity | Increase humidity with humidifier or moisture tray | Maintain RH around 40–60% |
| Soggy soil | Overwatering or poor drainage | Let topsoil dry; check pot drainage; repot if needed | Use pots with drainage holes |
| Pale leaves with subtle brown tips | Insufficient light | Move closer to light or supplement with grow light | Provide 6–8 hours of bright indirect light |
| Brown tips after pruning | Tool contamination | Sterilize blades between cuts | Keep tools clean and sharp |
Common Mistakes
- Overwatering due to assuming spider plants prefer constant moisture
- Using water with high mineral content without proper leaching
- Neglecting humidity in dry indoor environments
- Skipping pruning sanitation, spreading potential pathogens
Tips For Best Results
- Water with room-temperature, filtered water when possible to reduce mineral buildup.
- Set up a humidity-friendly location near kitchens or bathrooms if airflow is stagnant.
- Rotate the plant periodically to ensure even light exposure on all leaves.
- Use a light feeding schedule in spring and summer to promote healthy new growth.
- Monitor soil moisture precisely with the digital meter to avoid extremes.
Call A Professional
Seek professional advice if you notice persistent brown tips despite adjustments, or if you observe signs of pests, mold, or root rot. Early intervention can prevent long-term damage and protect other plants in the home.
FAQ
Why do spider plant leaves get brown tips?
Common causes include underwatering, underwatering, low humidity, overfertilization, or mineral buildup. Verifying moisture, humidity, and light helps identify the culprit.
Should I cut off brown tips right away?
Yes, prune damaged tips with clean tools to encourage healthy new growth and prevent further browning.
Can grow lights help with brown tips?
Grow lights can support growth in low-light rooms, reducing stress that contributes to browning when natural light is insufficient.
What’s the right humidity for spider plants?
Aim for about 40–60% relative humidity to minimize browning and support robust growth.
Is repotting necessary?
Repotting is recommended if the soil is compacted or roots are crowded, which can lead to root stress and browning.
How often should I water?
Water when the top inch of soil is dry, using a long-spout watering can to avoid soggy roots.
Buying Guide
When choosing gear to care for spider plants and prevent brown tips, consider size, noise, energy use, and placement. This guide helps compare options to fit a typical American home.
- Soil moisture meter to monitor watering needs without guesswork. Look for a model with a clear display and immediate readings.
- Stainless steel pruning shears for clean cuts on delicate leaves. Choose a sharp, corrosion-resistant pair with a comfortable grip.
- Watering can with long spout for precise irrigation into pot rims. A soft flow helps avoid overwatering and mineral buildup.
- Full spectrum LED grow light 6500K to supplement natural light. Favor energy-efficient, adjustable fixtures with diffused light to cover the plant evenly.
- Hygrometer to maintain indoor humidity for plant health. Prefer models with a quick update and easy-to-read scale.
Size should match the plant container and the room’s layout. Noise levels matter for adjacent living spaces; opt for compact, quiet units if needed. Evaluate energy efficiency for ongoing use, especially for grow lights. Placement considerations include avoiding direct harsh sun, ensuring adequate airflow, and keeping tools handy near your plant station.