Mold under a carpet is a common issue in damp or poorly ventilated spaces. Addressing the moisture source, removing affected materials, and treating the area are essential steps to restore a healthy home environment. This guide explains practical, step-by-step actions suitable for American homes and offers tools that can help identify moisture and manage the mold problem safely.
By following a structured approach, homeowners can assess severity, prevent recurrence, and choose appropriate tools and treatments. The guidance here emphasizes safety, proper drying, and effective cleaning without unnecessary steps or guesswork.
Quick Answer
Diagnose moisture first with a carpet moisture meter, then test for mold using a home mold testing kit. Dry thoroughly using a 50-pint dehumidifier, followed by targeted cleaning with a carpet cleaning extractor machine. If contamination is extensive, removal and professional remediation may be required.
What You’ll Need
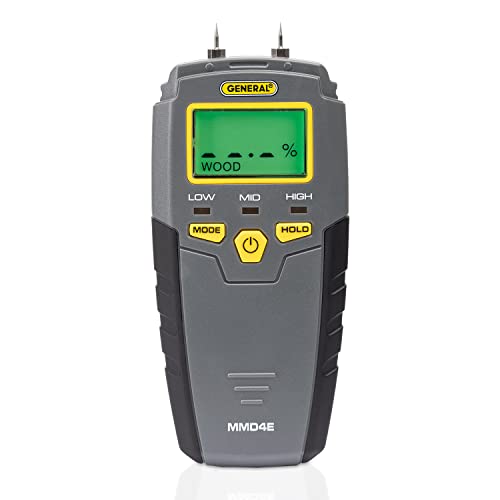
- Carpet moisture meter
- Mold test kit home mold testing
- 50-pint dehumidifier for mold
- Carpet cleaning extractor machine
- Floor scraper tool for carpet removal


Before You Start
Before beginning, identify the affected area and ensure good ventilation. Protective gear such as gloves, a NIOSH-approved respirator, and eye protection is recommended when handling mold. Remove furniture and lay down plastic sheeting to contain dust. Plan for a multi-step process that includes moisture control, cleaning, and drying. Expect a time range of several hours to a full day, depending on room size and moisture levels.
Check for hidden moisture sources, such as a leaky pipe, roof intrusion, or condensation. Address those issues first to prevent reoccurrence. If visible mold covers a large area (greater than 10 square feet), or if occupants have health concerns, consult a professional remediation service.
Step-By-Step: How To Get Rid Of Mold Under Carpet
- Measure and assess moisture: Use a carpet moisture meter to locate damp spots under the carpet and padding. Note any persistent readings that indicate ongoing moisture.
- Test for mold: Use a mold test kit home mold testing to confirm the presence and type of mold. Follow the kit instructions for sample collection and lab submission if required.
- Ventilate and control humidity: Set up fans and a 50-pint dehumidifier for mold in the room. Keep doors open and run the unit until relative humidity falls below 50% to inhibit mold growth.
- Isolate the affected area: If mold is localized to a small area, focus remediation there. For larger infestations, consider temporary containment to prevent spores from spreading.
- Determine carpet removal needs: If padding is damp or moldy, plan to remove the carpet and padding. Use a floor scraper tool for carpet removal to lift and separate layers cleanly.
- Remove contaminated materials: Carefully lift and dispose of any heavily contaminated carpet and padding. Place materials in sealed bags to minimize exposure.
- Clean the subfloor: Vacuum with a HEPA-equipped vacuum and wipe down the exposed subfloor with an appropriate antimicrobial cleaner. Allow to dry completely.
- Dry and treat the space: Run the dehumidifier continuously and use fans to accelerate drying. Check moisture levels with the carpet moisture meter periodically until readings stabilize.
- Prepare for replacement or remediation: If you plan to re-carpet, ensure the subfloor is dry and free of mold spores. Consider applying a mold-inhibiting primer or sealant to the subfloor if compatible with the new carpet.
- Install new materials: Install fresh padding and carpet, ensuring proper seam sealing and adequate stretching to prevent future moisture accumulation.
- Monitor and maintain ventilation: Keep humidity in check with ongoing ventilation and occasional use of the dehumidifier, especially in basements or high-moisture areas.
Troubleshooting
| Symptom | Likely Cause | Fix | Prevention |
|---|---|---|---|
| Persistent musty smell after drying | Hidden moisture or undetected mold | Re-check with moisture meter; reclean and re-dry | Improve ventilation; use dehumidifier regularly |
| Remnants of mold after cleaning | Surface mold deeply embedded in padding | Remove and replace affected padding; treat subfloor | Address moisture source promptly |
| Rising humidity after reinstallation | Insufficient drying time | Extend dehumidifier run time; increase airflow | Schedule periodic humidity checks |
| Carpet seams delaminating | Improper installation or moisture damage | Reinstall or replace with proper padding and adhesive | Ensure dry conditions before installation |
Common Mistakes
- Overlooking hidden moisture sources; mold returns if the source remains untreated.
- Using bleach on porous materials alone, which can spread spores and damage materials.
- Trying to dry only the surface without addressing padding or subfloor.
- Skipping protective gear, increasing exposure risk to occupants.
- Delaying removal of moldy carpet and padding when contamination is extensive.
Tips For Best Results
- Document readings with a moisture meter to track progress and verify when the area is dry.
- Choose a dehumidifier with adequate capacity for room size and humidity levels.
- Match cleaning products to materials and follow manufacturer instructions for safety and efficacy.
- Test new carpet underlay or padding for moisture tolerance before installation.
- Maintain airflow during drying to prevent stale air pockets and uneven drying.
Call A Professional
Stop signs that indicate professional help is needed include mold spreading beyond a small area, persistent health symptoms among occupants, or uncertain moisture sources (e.g., hidden leaks). If the mold coverage exceeds 10 square feet or the contamination is widespread, engage a certified remediation contractor to assess and perform remediation using industry-standard methods.
FAQ
Can I remove mold under carpet by myself?
For small, localized mold, DIY remediation is possible if proper safety precautions are followed and moisture is controlled.
What if the mold keeps returning after cleaning?
Persistent recurrence usually means an ongoing moisture source. Recheck leaks and ventilation and consider professional assessment.
Is it safe to use bleach on moldy carpet or padding?
Bleach is not always effective on porous materials and can create additional hazards; use approved antimicrobial cleaners and remove contaminated padding if necessary.
How long does it take to dry after mold removal?
Drying times vary by room size and humidity, but expect several hours to a full day with proper dehumidification and airflow.
Should I test the area for mold after cleaning?
Yes, using a mold test kit can confirm whether contamination remains or has been eliminated.
Is professional remediation always necessary?
Not always, but it is advisable for large areas, health concerns, or when moisture sources are difficult to resolve.
Buying Guide
When selecting tools to prevent and treat mold under carpet, consider size, noise, energy efficiency, controls, and placement. A small, quiet dehumidifier may fit bedrooms, while larger basements benefit from higher-capacity units. Look for energy-efficient models with humidistat controls to maintain steady humidity levels without over drying. For monitoring, a reliable carpet moisture meter helps locate moisture quickly. If a water event recently occurred, a carpet cleaning extractor machine can extract moisture and contaminants efficiently. Finally, ensure the floor scraper tool for carpet removal is sturdy and suited for the flooring type you encounter, as appropriate for safe, clean removal.
Buying Guide: Key Factors In Depth
Size and capacity: Choose dehumidifiers and tools that match room size. A too-small unit extends drying time and increases energy use. Noise level matters in living areas; aim for units designed for low sound output. Energy efficiency helps reduce running costs while keeping comfort intact. Controls should be simple: a digital humidistat, auto-restart after power outages, and ease of cleaning. Placement matters—position units to promote cross-ventilation without obstructing movement or access to the affected area.
Moisture detection: A reliable carpet moisture meter should provide clear indications for underlay and subfloor areas, guiding removal decisions. For mold confirmation, use a vetted mold test kit home mold testing to verify the type and extent of contamination. Replacement materials: If padding or carpet is contaminated, select padding and carpet with appropriate moisture tolerance and antimicrobial properties.
Maintenance and prevention: After remediation, maintain humidity around 40–50% and ensure prompt cleanup of any future spills or leaks. Regular inspections of potential moisture sources, such as basements and crawlspaces, help prevent mold before it starts. Considering these factors helps homeowners choose products that work well together and deliver lasting results.