Keeping an ice cream machine clean is essential for flavor integrity, equipment longevity, and food safety. This guide walks through practical steps for both home and light commercial use, highlighting-safe methods and the right cleaning products to use. Readers will learn a repeatable routine that minimizes downtime and prevents ice cream flavors from cross-contaminating.
Quick Answer
Disconnect the machine, remove and rinse all removable parts, wash with warm soapy water, rinse, sanitize, and dry before reassembling. For stubborn residues, use a dedicated cleaning kit and sanitize with appropriate tablets or solution. Schedule routine maintenance after every batch or daily for high-use machines.
What You’ll Need
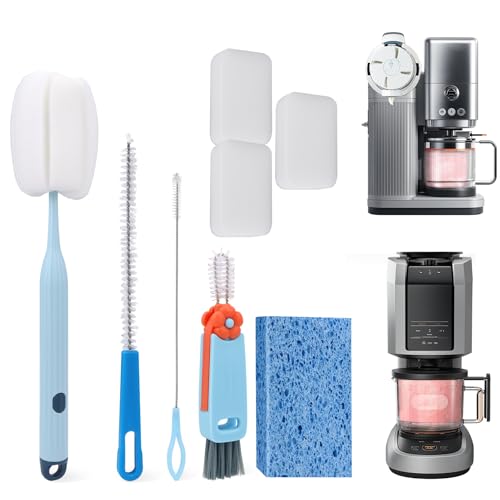
- Ice cream machine cleaning brush set
- Ice cream maker cleaning kit
- Ice cream machine sanitizing tablets
- Industrial ice cream machine cleaning solution
- Home ice cream maker maintenance kit
- Soft cloths or microfiber towels
- Warm water and mild dish soap
- Replacement gaskets or seals (if applicable)


Before You Start
Read the manufacturer’s manual for your model to identify removable parts and any special cautions. Work in a clean, well-lit area. Unplug the machine and allow moving parts to cool before handling. Wear protective gloves if dealing with hot cleaning solutions and ensure good ventilation when using chemical cleaners.
Time estimates vary by machine type: most steps take 20–40 minutes per batch for a typical home unit, slightly longer for larger, commercial-grade models. Plan for a thorough rinse after any cleaning solution to prevent taste transfer.
Step-By-Step: How To Clean An Ice Cream Machine
- Unplug and disassemble: Power off the unit, remove the dasher, and detach removable bowls or lids according to the manual.
- Cold rinse first: Rinse all removable parts under cool running water to loosen ice cream residues without introducing soap into the mix.
- Soapy wash: Wash all components with warm water and a mild dish soap. Use the ice cream machine cleaning brush set to reach crevices and impeller areas.
- Rinse thoroughly: Rinse each part thoroughly to remove all soap residues, which can affect flavor and texture.
- Sanitize: Prepare a sanitizing solution or use ice cream machine sanitizing tablets as directed. Soak or wipe all surfaces that contact dairy fluids, then allow to air-dry or pat dry with clean towels.
- Clean the exterior: Wipe down the exterior housing with a damp cloth, then dry to prevent water spots and corrosion.
- Inspect seals and gaskets: Check for cracks or wear. Replace if necessary using the home ice cream maker maintenance kit components or manufacturer-recommended parts.
- Dry assembly: Ensure all parts are completely dry before reassembling to prevent dilution of future batches and mold growth.
- Test run: Run a short rinse or test cycle with clean water to confirm there are no lingering residues or odors before resuming ice cream production.
- Document maintenance: Record cleaning date and any parts replaced to support ongoing upkeep and warranty compliance.
- Deep cleaning intervals: For heavy use, perform a deeper clean weekly using industrial ice cream machine cleaning solution as directed, and rotate sanitizing tablets to maintain hygiene standards.
- Store properly: When not in use, store parts in a clean, dry area to prevent dust buildup and ensure quick readiness for the next batch.
Troubleshooting
| Symptom | Likely Cause | Fix | Prevention |
|---|---|---|---|
| Residual smell after cleaning | Soap residue or incomplete rinsing | Rinse thoroughly and run a short sanitize cycle | Rinse until water runs clear |
| Foaming during startup | Soap or cleaning agents not fully rinsed | Rinse again and run a water-only cycle | Use minimal soap and extra final rinse |
| Poor ice cream texture | Residue affecting freezing or air incorporation | Deep clean with industrial cleaner if advised | Follow maintenance schedule |
| Leaks around seals | Worn gaskets | Replace with home maintenance kit parts | Inspect seals monthly |
Common Mistakes
- Using abrasive scrubbers on delicate surfaces, which can scratch seals
- Skipping the rinse step, leaving soap or sanitizer residues
- Not sanitizing regularly, especially in higher-use settings
- Assembling while parts are still damp, promoting mold growth
Tips For Best Results
Set a routine that matches usage: light home use may require cleaning after each batch, while busy kitchens benefit from a daily routine and a weekly deep clean with an industrial cleaner. Use the right tools—specifically the ice cream machine cleaning brush set and cleaning kit—to reach hard-to-clean corners. Ensure all sanitizing products are compatible with your model, and always follow the label directions for contact time and dilution.
Call A Professional
Consult a technician if the machine has persistent leaks, unusual noises, electrical issues, or if you suspect refrigerant problems. Do not attempt internal repairs beyond basic gasket replacement or cleaning kit use. If the unit is under warranty, contact the manufacturer or authorized service provider to avoid voiding coverage.
FAQ
How often should I clean my ice cream machine?
Clean after every batch for home models; for commercial or high-use machines, perform a quick rinse daily and a full clean weekly.
Can I use dishwasher soap?
Use mild dish soap for hand washing if allowed by the manufacturer. Some parts may be dishwasher-safe, but always verify before loading.
What if I don’t have sanitizing tablets?
Use an approved industrial or home cleaning solution according to label directions, ensuring proper contact time for sanitation.
Is it safe to use vinegar for cleaning?
Vinegar is not recommended for dairy equipment as it can affect flavor and cause corrosion. Use manufacturer-approved products instead.
How do I know if gaskets need replacement?
Check for cracks, brittleness, hardening, or leaks. If in doubt, replace with the appropriate maintenance kit components.
What should I do after replacing seals?
Test for leaks with a short cycle before producing ice cream and recheck seals after the first full batch.
Buying Guide
Choosing cleaning supplies and maintenance kits requires considering model compatibility, use frequency, and safety. Look for a kit that includes a dedicated ice cream machine cleaning brush set and an ice cream maker cleaning kit so you can address both surface cleaning and hard-to-reach areas. For higher-volume operations, an industrial ice cream machine cleaning solution paired with sanitizing tablets ensures robust hygiene. A home ice cream maker maintenance kit should cover seals, gaskets, and basic replacement parts. Consider whether the kit supports your specific model and whether it includes clear instructions or customer support. Sound considerations include aroma-free cleaners and minimal downtime during sanitation.
Frequently Asked: Quick Reference
What are the best tools to keep an ice cream machine clean? A combination of cleaning brushes, dedicated cleaning kits, sanitizing tablets, and appropriate maintenance parts designed for your model.