Yellowing on sneaker soles is a common issue that can be tackled with simple household items. This guide explains a practical, step‑by‑step method using toothpaste and common cleaning tools to restore brightness without damaging the shoes.
Quick Answer
Toothpaste can remove light yellowing from sneaker soles when applied with a soft brush and a little elbow grease. Use a non-gel, whitening toothpaste and a gentle brush to avoid scuffing. For stubborn stains, repeat the process or combine toothpaste with a magic eraser sparingly.
What You’ll Need
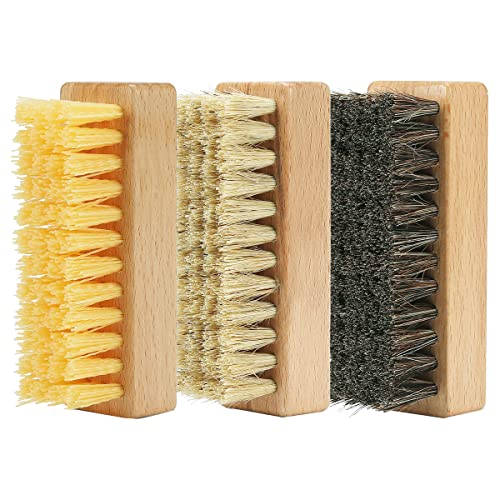
- sneaker cleaning brush set soft bristle
- shoe cleaning kit microfiber cloth brushes
- magic eraser sneaker cleaning yellowed soles
- toothpaste for sneakers whitening with toothbrush
- soft bristle toothbrush for sneaker cleaning and whitening


Before You Start
Before cleaning, remove laces and insoles if possible. Clear a work area and protect nearby surfaces with a towel. Test the toothpaste on a small, inconspicuous area of the sole to ensure it doesn’t discolor the material. Use gentle, circular motions to avoid scrubbing too hard, which can wear away the sole’s depth and color. Expect to spend 15–30 minutes per pair, depending on the level of yellowing.
Step-By-Step: How To Clean Yellow Soles With Toothpaste
- Dry brush the sole to remove loose dirt with a sneaker cleaning brush set.
- Apply a non-gel whitening toothpaste directly to the yellowed areas.
- Dip the soft bristle toothbrush into a small amount of water and start brushing in circular motions.
- Continue for 2–3 minutes on each section, focusing on stubborn stains.
- Wipe away toothpaste residue with a microfiber cloth and check progress in good lighting.
- If needed, reapply toothpaste and repeat the brushing process for layers of buildup.
- For particularly tough spots, gently use a magic eraser on the sole, testing first on a less visible area.
- Rinse the area with a damp cloth and dry with a clean towel. Allow the sneakers to air dry completely before wearing.
- Reassemble the shoes and store them in a ventilated area away from direct heat.
- Optional: To maintain whiteness, perform a quick touch‑up every few weeks using the same method.
- Dispose of used rags responsibly and clean brushes after use to prevent transferring dirt to other items.
Troubleshooting
| Symptom | Likely Cause | Fix | Prevention |
|---|---|---|---|
| Yellowing returns after cleaning | Buildup in crevices or residual toothpaste | Re‑clean with careful brushing and wipe thoroughly | Clean regularly to prevent buildup |
| Toothpaste leaves white residue | Excess toothpaste not rinsed | Wipe with damp cloth until residue is gone | Use a small amount and rinse thoroughly |
| Scratches or dull appearance | Over‑aggressive scrubbing or rough brush | Switch to softer brushes and gentler strokes | Test on hidden area first; avoid harsh tools |
| Color transfer to cloth | Ink or dye in outsole | Stop and consult product guidelines; try gentler cleaning | Use dedicated whitening products for stubborn stains |
Common Mistakes
- Using gel toothpaste or abrasive whitening gels that can stain or dry out materials.
- Over‑soaking sneakers, which can seep moisture into the midsole and fabric.
- Using harsh brushes or scouring pads that scratch the sole or midsole.
- Rushing the drying process; moisture can cause mildew or odors.
Tips For Best Results
- Choose a soft bristle toothbrush and a dedicated brush set to control the cleaning intensity.
- Work in a shaded area to prevent quick drying that leaves streaks.
- Pair toothpaste with a microfiber cloth for final polishing and shine restoration.
- Keep a routine: light yellowing responds well to periodic maintenance rather than deep cleaning every month.
Call A Professional
Consider professional help if yellowing is extensive, if soles are cracked, or if you notice persistent discoloration after repeated cleaning. Signs to seek a pro include:
– Deep, ingrained yellowing that won’t budge with standard methods
– Visible material damage or crumbling in the sole
– Shoes valued for sport performance or special editions where restoration could affect value
FAQ
Can toothpaste damage sneaker materials?
When used gently on non‑gel toothpaste, it is generally safe for many outsole plastics, but always test first on a hidden area.
Is a magic eraser safe for white or colored soles?
Light use on stubborn spots can help, but excessive use may dull or wear away the surface; test in a small area.
How long should I let the sneakers dry after cleaning?
Allow 6–12 hours of air drying in a well‑ventilated space away from direct heat or sunlight.
Can I skip rinsing and rely on wipes only?
Rinsing helps remove toothpaste residue and prevents streaks; if using wipes, ensure they are clean and not overly absorbent.
Will toothpaste work on all colors of soles?
Toothpaste is most effective on white or light‑colored soles; darker colors may require specialized cleaners or higher concentration products.
Buying Guide
When evaluating cleaners for yellow soles, consider factors like size, ease of use, and material compatibility. A simple kit with sneaker cleaning brushes and microfibers provides versatility, while a dedicated magic eraser can address stubborn spots. For those prioritizing convenience, choose a compact shoe cleaning kit that includes multiple brush sizes and soft cloths. Noise level and energy use are not major concerns for manual cleaning; focus on the effectiveness of the cleaning agents and the gentleness of tools. Place sneakers in a dry, ventilated area during and after cleaning to preserve sole integrity and prevent odors. If unsure, begin with gentler methods and test on a small area before expanding the process.