Windowsills accumulate dust, dirt, and condensation more than other surfaces in a home. A thorough cleaning restores their appearance and helps prevent buildup that can affect window performance. This guide provides a practical approach using common tools and a focused cleaning routine suitable for most American homes.
Whether you’re refreshing a sunny kitchen window or a long row of office panes, the steps below offer a clear method to remove grime without damaging finishes or finishes on windowsills.
Quick Answer
Dust with a microfiber cloth, scrub with a sponge or stiff-bristle brush, wipe away with a damp microfiber cloth, and dry. For stubborn stains, use a gentle cleaner and a silicone blade squeegee to lift residues without scratching. Finish with a protective wipe to reduce future buildup.
What You’ll Need
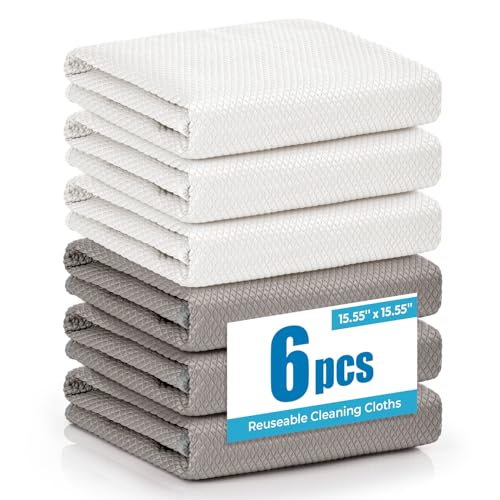
- Microfiber window cleaning cloth 12×12 inches for windowsills
- Extendable window squeegee with silicone blade 14 inch
- Window cleaning kit with sponge scrubber and scraper
- Angled window sill cleaning brush with stiff bristles
- Telescoping window cleaning wand with microfiber sleeve


Before You Start
Clear the area around the windowsill and protect nearby surfaces with a drop cloth. Ventilate the room if you’re using cleaning solutions. Time estimate: 15–25 minutes per window, depending on sill depth and grime level. Avoid harsh chemicals on painted or delicate finishes. If you rent or live in a historic home, test a small inconspicuous area first to ensure colorfastness and finish integrity.
Step-By-Step: How To Clean Windowsills
- Remove loose dust with a dry microfiber cloth, working from the top edge downward to prevent settled dust from resettling on cleaned areas.
- Use the angled window sill cleaning brush with stiff bristles to dislodge caked dirt along the front lip and corners.
- Apply a mild cleaning solution to the sponge scrubber and scrub the sill, paying extra attention to corners and joints where grime accumulates.
- Rinse the sponge or wipe with clean water and wipe the sill again to remove soap residues.
- Wipe the sill with a microfiber window cleaning cloth 12×12 inches, drying thoroughly to prevent water spots.
- For hard-to-reach areas, extend the telescoping window cleaning wand with microfiber sleeve to reach deeper sills or high window corners, then wipe away loosened residue.
- Use the extendable window squeegee with silicone blade to lift remaining liquid from the front surface, moving in one direction to avoid streaks.
- Inspect for remaining spots and repeat cleaning on stubborn patches if needed, then finish with a dry cloth to buff the surface.
- Optionally apply a light protective wipe or sealant appropriate to the sill material to reduce future buildup.
- Return items to their storage area and dispose of any used cloths appropriately, keeping a neat workspace for the next cleaning session.
- Regular maintenance: quick dusting once a week and a deeper clean monthly helps prevent heavy buildup.
- For multi-sill windows, repeat the process in a single pass to minimize dirt transfer from one sill to another.
Troubleshooting
| Symptom | Likely Cause | Fix | Prevention |
|---|---|---|---|
| Streaks after cleaning | Water spots or insufficient drying | Dry with a microfiber cloth after squeegeeing | Dry each area as you go; avoid cleaning in direct sun |
| Residual grease or smudges | Soap residue or oily films | Rinse with clean water and re-wipe | Use a mild, non-abrasive cleaner |
| Scratches on painted sill | Using stiff bristles on delicate finishes | Switch to a softer brush or sponge | Test cleaners on a hidden area first |
| Stubborn mold or mildew in damp climates | Moisture retention | Clean with a diluted mild bleach solution or dedicated mildew cleaner | Improve ventilation and wipe surfaces dry |
Common Mistakes
- Using abrasive brushes or scouring pads on delicate sills
- Over-wetting the sill and letting water pool at the bottom
- Skipping drying, leading to water spots or mold growth
- Neglecting corners and lip edges where grime hides
Tips For Best Results
- Choose microfiber cloths and sleeves to trap dust effectively and avoid lint transfers.
- Work in sections, especially on longer sills, to prevent recontamination from dirty sections.
- Opt for a silicone blade squeegee to reduce streaks compared to standard rubber blades.
- Use a mild, pH-balanced cleaner suitable for the sill material (paint, wood, or PVC).
- Lightly mist the cleaner rather than soaking surfaces to control run-off.
- Let cleaners dwell for a minute on heavy grime, then scrub gently to lift residue.
Call A Professional
Consider contacting a professional if sills are severely damaged, stained beyond routine cleaning, or show persistent moisture problems that might indicate underlying leaks. If you notice warping, peeling paint, or rot in wooden sills, a pro can assess structural integrity and recommend repairs or replacements.
FAQ
What’s the best method to clean painted window sills?
Use a mild cleaner and a soft brush or sponge, then dry thoroughly to prevent paint damage and water staining.
Can I clean window sills with just water?
Water helps remove loose dust, but a mild cleaner improves stain removal and lift of oils or grime.
How often should I clean window sills?
Light weekly dusting plus a deeper clean every 4–6 weeks works well for most homes.
Is it safe to use bleach on wooden sills?
Bleach can damage wood finishes; use diluted solutions or consult finish guidelines before applying.
What tools are essential for quick upkeep?
A microfiber cloth, a stiff-bristle brush for tough grime, and a silicone-blade squeegee make routine cleaning efficient.
Should I remove window screens during cleaning?
Removing screens can help access the sill, but ensure you keep screens safe and clean separately to prevent damage.
Buying Guide
Choosing the right tools for window sill cleaning depends on sill material, cleaning frequency, and preferred workflow. Consider the following factors to compare options effectively.
- Size and reach: If you have deep or high window sills, opt for a telescoping wand and an extendable squeegee to minimize climbing.
- Noise and ease of use: Look for a silicone blade squeegee that operates quietly and leaves fewer streaks than traditional blades.
- Material compatibility: Check that cleaners and tools are safe for wood, painted surfaces, PVC, or stone sills to avoid discoloration or damage.
- Controls and versatility: A kit with a sponge scrubber and scraper offers flexibility for different grime levels and edge cleaning.
- Portability and storage: Lightweight, compact tools with a dedicated storage bag reduce clutter and make quick touch-ups easier.
- Replacement parts: Prefer tools with replaceable sleeves and blades to extend the life of your kit and save money over time.
- Durability and warranty: Durable construction and reliable customer support help ensure long-term performance.
For most households, a balanced setup includes a microfiber cloth, a stiff-bristle brush for tough grime, a sponge scrubber, a silicone blade squeegee, and a telescoping wand. This combination supports both routine maintenance and deeper cleans without frequent tool changes.