White heat marks on wood furniture can mar the look of your pieces. This guide explains practical methods using common restoration products and household techniques. It covers quick fixes and longer-lasting solutions, so you can restore the wood’s natural finish with minimal fuss.
Following these steps helps you decide whether to use a heat stain remover kit, wax sticks, fillers, or markers. The goal is to blend the stain with the surrounding wood fiber while preserving the piece’s character and value.
Quick Answer
Best first step: test a gentle heat method on an inconspicuous area, then choose a repair kit or wax stick if the stain persists. For deeper whitening, consider a wood filler epoxy and a touch-up pen to color-match.
What You’ll Need
- Wood furniture heat stain remover kit
- Furniture repair wax stick heat mark remover
- Wood filler epoxy for heat damage white spots
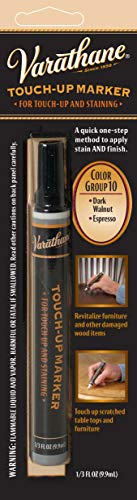
- Wood furniture touch up pen stain marker
- Furniture repair kit for white heat marks on wood


Before You Start
Clear the work area and protect nearby surfaces with a drop cloth. Test every product on a small, hidden area first to avoid color changes. Wear gloves to minimize skin contact with solvents. Plan for a minimum 1–2 hours of work plus drying time, and expect multiple passes for stubborn stains. Important: stop if the finish shows bubbling or lifting, as that indicates deeper damage.
Step-By-Step: How To Remove White Heat Stains On Wood
- Identify the stain’s extent by gently inspecting the surface and the surrounding grain.
- Try a low-heat technique first: place a clean cloth over the spot and apply a warm iron on a low setting for a few seconds at a time, moving frequently. Do not press hard.
- If the heat stain remains, apply a wood furniture heat stain remover kit per the manufacturer’s instructions to lift the moisture that caused the whitening.
- For partial fading, rub a small amount of furniture repair wax stick heat mark remover into the grain with a plastic scraper until it disappears into the surface.
- Assess the color after the wax cools. If the hue is uneven, proceed with a wood filler epoxy for heat damage white spots to fill deeper areas, following the product’s mixing ratios.
- Once epoxy sets, sand lightly with fine-grit paper until smooth and flush with the surrounding finish.
- Use a wood furniture touch up pen stain marker to color-match the repaired area to the surrounding wood tone. Apply in thin layers, allowing cure between passes.
- Wipe away excess marker and buff with a soft cloth. If needed, seal the repaired area with a compatible clear finish.
- Re-check the surface under different lighting. Repeat any step in small increments until the finish looks uniform.
- Clean tools promptly and store materials in a cool, dry place to maintain effectiveness for future use.
Troubleshooting
| Symptom | Likely Cause | Fix | Prevention |
|---|---|---|---|
| Stain returns after drying | Moisture trapped under finish | Reapply stain remover kit and allow longer drying | Control humidity during repair |
| Whitening spreads beyond stain | Over-application or aggressive rubbing | Limit product amount and pad gently | Test in hidden area first |
| Finish dulled after wax | Wax residue buildup | Buff with a clean cloth; remove excess wax | Apply thin, even coats next time |
| Epoxy sheen or mismatch | Improper mixing or curing | Re-mix per instructions; ensure full cure | Follow exact timing and ratios |
Common Mistakes
- Using aggressive heat or high heat settings, which can scorch wood
- Overlining color with markers, causing dark halos
- Skipping a test area and committing to a color or finish
- Failing to allow adequate drying time between steps
Tips For Best Results
- Work in a well-lit area to better judge color balance.
- Choose a marker that closely matches the wood’s natural shade and undertones.
- Begin with the least invasive method and escalate only if necessary.
- Document your process with notes or photos to reproduce the fix if needed later.
Call A Professional
Seek professional help if the stain covers a large area, affects the veneer, or if the wood shows warping, peeling, or color distortion after several repair attempts. Signs that require a pro include persistent white spots after multiple methods, or a finish that tears or lifts during repair.
FAQ
Can heat stains be removed with standard household products?
Many heat stains respond to dedicated kits, wax sticks, or epoxy fillers, though household products may help for shallow marks.
Will refinishing always be required?
Not always; minor heat spots can often be repaired with wax or marker touch-ups, preserving most finishes.
Should I sand the area before using a repair kit?
Sanding is usually unnecessary for light stains, but may be required for deeper damage or when epoxy is used.
How long do repairs typically take?
Most fixes take 1–3 hours, including drying time between steps; deeper repairs may require longer.
Is color matching essential?
Yes, color matching helps the repair blend invisibly with surrounding wood.
Can I use stain markers on all wood species?
Markers work best on pale or medium woods; darker woods may require a combination of methods.
What if the stain reappears after weeks?
That may indicate lingering moisture or damage; reassess with a professional if it recurs.
Buying Guide
When choosing products to address white heat marks, consider size, finish compatibility, and ease of use. Look for kits that include clear instructions, color-matching options, and safe solvents. Consider how often you anticipate minor repairs and whether you prefer a single all-in-one kit or separate tools like a wax stick, epoxy, and marker. Think about the piece’s use in daily life—high-traffic furniture may benefit from a more durable finish. Finally, compare user reviews for real-world performance on similar wood types.