Rust stains and corrosion can be challenging, but vinegar offers a simple, inexpensive method for many household surfaces. This guide explains safe preparation, effective steps, and common pitfalls to achieve clean, rust-free results without harsh chemicals.
Readers can follow practical, step-by-step instructions that focus on typical American households and commonly used tools. The approach emphasizes caution, suitable alternatives for fragile surfaces, and where to seek professional help for persistent rust issues.
Quick Answer
Soak or apply white vinegar directly to rusty areas, let it sit to loosen iron oxide, scrub with appropriate brushes or abrasive pads, and repeat as needed. For stubborn rust, combine vinegar with baking soda or use mechanical agitation with a drill brush attachment. Always test a small area first and rinse thoroughly.
What You’ll Need
- White vinegar (as the primary rust remover)
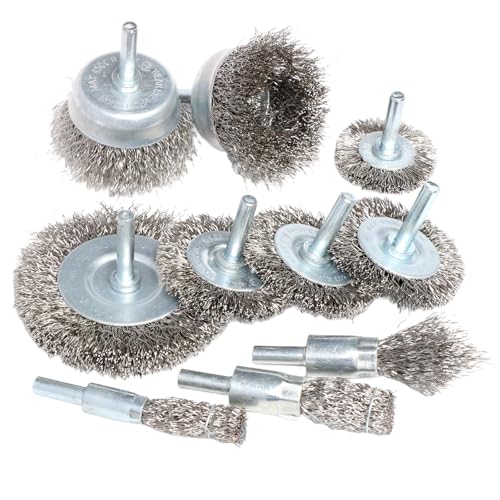
- Stainless steel wire brush rust removal kit
- Brass wire brush rust remover tool
- Scouring pad abrasive pads rust removal 3M
- Drill brush attachment rust remover kit
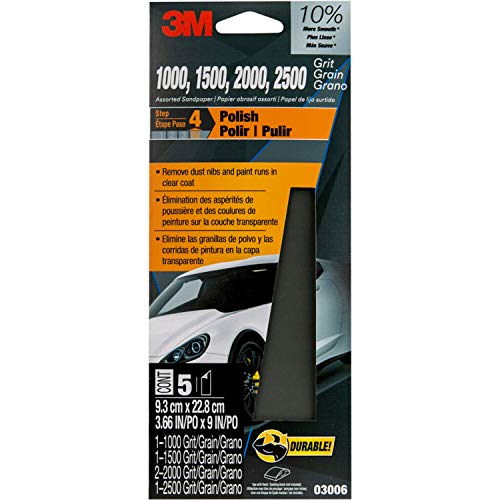
- 1000-2000 grit sandpaper rust removal sanding set

Before You Start
Inspect the surface for type and extent of rust. For delicate finishes, avoid harsh metal brushes that could scratch. Work in a well-ventilated area and wear gloves to protect skin. Time estimates vary: light rust may take 15–30 minutes per area, while heavy corrosion could require multiple sessions over several days. Keep acids away from aluminum and enamel finishes, which vinegar can dull or etch.
Step-By-Step: How To Clean Rust With Vinegar
- Clear the area and protect nearby surfaces with drop cloths or plastic sheeting.
- Prepare the rusted item by removing loose debris with a dry cloth.
- Pour or apply white vinegar directly onto the rusted surface or submerge smaller items in a container.
- Allow the vinegar to sit for 15–60 minutes, depending on rust severity. For severe rust, reapply vinegar and re-soak as needed.
- Scrub the area with a suitable brush: use a stainless steel wire brush for sturdy metals, or a brass wire brush for gentler surfaces.
- For difficult spots, use a 1000-2000 grit sandpaper to smooth the edges and remove remaining rust particles.
- Rinse with clean water and dry thoroughly to prevent new rust formation.
- Reuse vinegar if residue remains and repeat scrubbing until metal returns to its original color or a clean patina.
- Apply a rust-preventive sealant or protective coating if the item will be exposed to moisture again.
- Inspect the area after drying; if rust returns quickly, consider immobilizing moisture sources or applying a protective finish.
- Document the process and plan a regular maintenance schedule to prevent future rust buildup.
Troubleshooting
| Symptom | Likely Cause | Fix | Prevention |
|---|---|---|---|
| Rust reappears after brief use | Moisture exposure or inadequate sealing | Re-clean and re-seal with rust inhibitor | Keep items dry and store properly |
| Surface scratches or dull finish | Overly aggressive brushing | Switch to brass brush or finer sanding; minimize pressure | Test on a hidden area first |
| Stains remaining around edges | Residual mineral deposits | Reapply vinegar and scrub with a finer pad | Rinse thoroughly and dry completely |
| Corrosion under coating | Protective layer compromised | Remove coating, treat rust, reapply with a primer | Choose corrosion-resistant finishes |
Common Mistakes
- Using vinegar on aluminum or delicate enamel surfaces without testing first.
- Rushing the soaking time, leading to uneven rust removal.
- Over-reliance on metal brushes that scratch or widen rust pits.
- Skipping thorough drying, which invites quick re-rust.
- Ignoring safety gear, especially gloves and eye protection.
Tips For Best Results
- Apply vinegar warm to speed up rust dissolution, but avoid boiling to prevent splatter injuries.
- Combine vinegar with a paste of baking soda for stubborn spots, then rinse well.
- Alternate between brushing and sanding to balance efficiency and surface care.
- Test on an inconspicuous edge to ensure compatibility with finishes.
- After rust removal, immediately seal or paint to slow moisture ingress.
Call A Professional
Seek professional help if rust has compromised structural integrity, penetrated through thick coatings, or if the item is critical equipment. Stop work and consult a metal specialist if you notice pitting, thinning metal, or rust near electrical components.
FAQ
Can vinegar remove all rust types?
Vinegar works well for light to moderate rust on many metals but may be less effective on heavy, deep corrosion or highly porous surfaces.
Is vinegar safe on stainless steel?
Yes, vinegar is generally safe on stainless steel, but always test a small area first to avoid dulling or etching.
How long should I soak items in vinegar?
Typical soaking ranges from 15 minutes to an hour, depending on rust severity; avoid prolonged exposure that could damage the metal finish.
What can I do after rust removal to prevent it?
Apply a sealant, rust inhibitor, or protective coating and keep the item dry to minimize future rust formation.
Is heat helpful when using vinegar for rust?
Warm vinegar can enhance rust-removal activity, but avoid hot temperatures that could damage finishes or cause splatter injuries.
Are there safer alternatives for delicate metals?
Brass brushes and softer sanding pads reduce the risk of scratching on delicate metals; consider specialized rust removers for sensitive surfaces.
Will vinegar damage paint?
Yes, prolonged exposure can peel or dull paint; remove only on bare metal surfaces or test first on a hidden area.
Buying Guide: Key Factors To Consider When Choosing Rust-Removal Tools
Selecting the right tools for rust removal with vinegar depends on surface type, rust severity, and maintenance goals. Start by evaluating the material you’re treating and whether you prefer chemical-assisted or mechanical methods. Below are factors to compare and consider:
- Surface compatibility: Delicate finishes require gentler tools like brass brushes or soft scouring pads; tougher metals can tolerate steel brushes.
- Rust severity: Light scaling benefits from soaking and pad scrubbing; heavy rust may need mechanical agitation with drill attachments and finer sandpaper.
- Tool versatility: A rust removal kit with multiple brush types (stainless steel, brass, and drill attachments) provides flexibility for different jobs.
- Abrasive options: 1000–2000 grit sandpaper offers controlled finishing after initial rust removal and helps reduce pit depth.
- Surface area: Large flat areas may require abrasive pads for broader coverage, while irregular shapes benefit from small brushes.
- Safety and cleaning: Choose tools with comfortable grips and low splatter; pair with gloves and eye protection for safer operation.
- Maintenance: Look for rust-preventive coatings or primers to extend the life of treated items.
In practice, a combination approach often yields the best results. Start with vinegared soaking for initial loosen, then switch to brushes for mechanical action. If the surface is highly sensitive or valuable, consult a professional rust-removal service or hardware expert for tailored guidance. With the right tools and method, a vinegar-based rust removal routine becomes a practical, cost-effective DIY solution for many American homes.