Vinegar is a simple, inexpensive, and natural option for cleaning many types of hardware, from door hinges to metal fittings. This guide covers practical methods to use vinegar safely, along with tools, techniques, and troubleshooting tips to restore luster while protecting metal surfaces.
Whether you are refreshing brass knobs, removing rust from hardware, or preparing components for a project, following a structured approach helps achieve reliable results without damage. The steps below combine everyday household solutions with specialized tools to handle stubborn grime and corrosion effectively.
Quick Answer
Simple method: Soak metal hardware in a solution of plain white vinegar and water, scrub with a brush or steel wool, rinse, dry, and apply a light lubricant or protective finish as needed. For heavy rust, consider a gel rust remover or ultrasonic cleaning for best results.
The Clear Path To Clean Hardware
For most household hardware, a vinegar-based cleaning routine can remove grease, mineral deposits, and light rust. However, heavily corroded items may require repeat treatments or stronger products. Always test a small, inconspicuous area first and ensure good ventilation when using any cleaner.
What You’ll Need
General tools and materials
- White household vinegar (acetic acid 5%)
- Water
- Steel wool pads rust removal hardware cleaning
- Wire brush set cleaning hinges rust hardware
- Brass hardware cleaning cloths kit
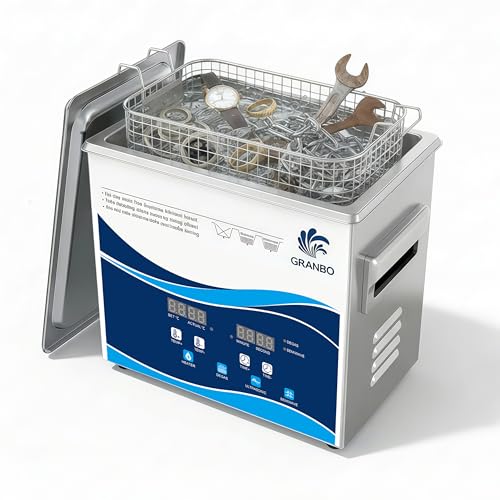
- Ultrasonic cleaner for metal parts
- Rust remover gel for metal hardware cleaning


Before You Start
Assess the metal type: brass, steel, or other alloys. Vinegar works well on many metals but can affect certain finishes. Clear, non-porous surfaces tolerate soaking; porous finishes or delicate coatings may require gentler handling. Work in a well-ventilated area and wear gloves to protect skin. Plan a time range for each step: soaking, scrubbing, rinsing, and drying may take 30–60 minutes for minor rust and longer for heavy corrosion.
Cautions: Do not soak decorative or lacquered hardware for extended periods, as vinegar can dull or strip finishes. For items with mixed metals or adhesives, test a small area first. After cleaning, thoroughly rinse with water and dry completely to prevent new corrosion.
Step-By-Step: How To Clean Hardware With Vinegar
- Identify the task: Decide whether the objective is grease removal, mineral deposits, or rust restoration. This helps choose the right method and tools.
- Prepare the cleaning solution: Mix equal parts white vinegar and warm water for most jobs. For stubborn rust, increase vinegar concentration or apply straight vinegar briefly to targeted spots.
- Disassemble if possible: If hinges or hardware can be taken apart safely, do so to expose all surfaces and avoid hidden grime.
- Soak or apply: Submerge smaller metal parts in a container of vinegar solution, or apply undiluted vinegar to larger items with a cloth or brush. Allow to sit 15–30 minutes for light grime; longer for heavy rust (as needed).
- Scrub with appropriate tools: Use a wire brush set cleaning hinges rust hardware for crevices, or steel wool pads rust removal hardware cleaning to lift corrosion. Be gentle on delicate finishes.
- Rinse thoroughly: Rinse with clean water to remove vinegar and loosened debris. For stubborn residue, repeat soaking and scrubbing.
- Dry completely: Wipe dry with a clean cloth; allow items to air-dry completely to prevent flash rust. For metal parts prone to corrosion, consider a light oil or corrosion-preventive spray.
- Polish and protect: Use the brass hardware cleaning cloths kit on brass pieces to restore shine. For steel and other metals, a thin layer of mineral oil or a silicone-based protectant helps reduce future staining.
- Reassemble and test: Reassemble components and operate moving parts to ensure smooth movement after cleaning.
- Optional ultrasonic step: If available, run parts through an ultrasonic cleaner for metal parts with a mild cleaning solution to reach tight corners and intricate details.
- For stubborn rust: Apply a rust remover gel for metal hardware cleaning following product instructions, then rinse and dry thoroughly.
Troubleshooting
| Symptom | Likely Cause | Fix | Prevention |
|---|---|---|---|
| Faint dulling after cleaning | Remaining stains or minor oxidation | Reapply vinegar soak or use brass cloths for brass; polish lightly | Test on small area first; avoid excessive soaking |
| White residue after drying | Mineral buildup from water | Rinse thoroughly and dry completely; wipe with a dry cloth | Dry promptly; use distilled water for final rinse if needed |
| Finish flaking on coated hardware | Harsh cleaning or long vinegar exposure | Limit exposure time; reapply protective finish | Test compatibility on inconspicuous spot first |
| Reappearing rust on steel | Residual rust left behind | Repeat cleaning; consider rust remover gel for heavy rust | Keep surfaces dry and apply a protective coating |
Common Mistakes
- Using vinegar on delicate finishes without testing first
- Soaking hardware with painted or lacquered coatings for too long
- Skipping thorough drying, leading to quick redeposition of rust
- Neglecting to disassemble parts that require access to hidden areas
Tips For Best Results
- For heavy rust, alternate soaking with brief scrubbing to avoid pitting.
- Use steel wool pads rust removal hardware cleaning on textured or rough surfaces to maximize contact area.
- Test vinegar on a small patch to confirm it won’t damage plating or coatings.
- Follow up with appropriate finishes (oil, wax, or protective spray) to slow future corrosion.
- Keep items dry when not in use and store in a low-humidity area.
Call A Professional
Seek professional help if hardware is valuable, antique, or highly intricate, or if rust is deeply pitted and structural integrity is a concern. Stop cleaning if the surface shows bubbling, flaking, or discoloration beyond mild staining. Complex hinges, door hardware embedded in fixtures, or alloys with uncertain composition warrant expert assessment.
FAQ
Can vinegar damage brass hardware?
Vinegar is generally safe for brass if used briefly and rinsed well, but test first and avoid long exposure.
Is ultrasonic cleaning necessary for all hardware?
No, but it helps reach tight spots and is especially useful for small parts or intricate designs.
What should I apply after cleaning to prevent rust?
A light mineral oil, silicone-based spray, or wax can provide a protective barrier against moisture and air.
How do I remove stubborn rust without damaging the metal?
Use rust remover gel designed for metal hardware and follow the product’s instructions carefully, then rinse and dry thoroughly.
Buying Guide: Choosing The Right Cleaning Setup For Hardware
When selecting tools and cleaners for hardware cleaning, consider factors such as material type, finish, and the extent of corrosion. A practical kit blends everyday vinegar-based cleaning with targeted tools for rust and grime. Buyers should weigh size compatibility with the hardware they own and consider storage space for brushes, cloths, and cleaners. For frequent maintenance, a compact ultrasonic cleaner can simplify routine cleaning of small parts, while steel wool and wire brushes handle stubborn deposits. A dedicated brass cloth kit helps preserve shine on brass hardware and adds a finishing touch after rust removal.
Key buying factors include:
- Size – Choose tools and cleaners suited to the dimensions of the hardware you repair.
- Material compatibility – Verify that cleaners won’t damage brass, steel, or coated finishes.
- Noise level – Ultrasonic cleaners and power brushes vary in noise; select a model that fits your workspace.
- Energy efficiency – Opt for energy-efficient ultrasonic devices and low-power cleaning tools.
- Controls – Look for straightforward settings and visibility of cleaning cycles.
- Placement – Consider a ventilated, dry area; store cleaning supplies away from children and pets.
Whether refreshing a small brass handle or reviving steel hinges, the vinegar-based method offers a versatile starting point. For persistent rust or delicate finishes, supplement with specialized products and tools aligned to the metal type and finish. With careful steps, regular maintenance, and the right kit, hardware can regain its original shine and function without harsh chemicals.