Spilled nail polish can be a frustrating mess, but with the right steps and tools, the stain and odor can be controlled quickly. This guide explains a practical, step-by-step approach for American households to clean up nail polish spills on different surfaces, from floors to fabrics.
Whether you’re dealing with a small droplet on a hard surface or a larger splatter on clothing, following these actions helps minimize damage and make cleanup easier. The following sections introduce a focused routine, common pitfalls to avoid, and a buying guide to help select the best cleanup products.
Quick Answer
Act fast: blot excess liquid, use a nail polish spill cleanup kit or acetone pads on non-porous surfaces, then clean with a lint-free wipe or microfiber cloth. For fabrics, apply stain remover brush and blot gently. Repeat as needed until the stain lifts, then launder if washable.
What You’ll Need
The list below draws from common nail polish cleanup supplies and related items. Gather these before starting to keep the process smooth and efficient.
- Nail polish spill cleanup kit
- Acetone nail polish remover pads
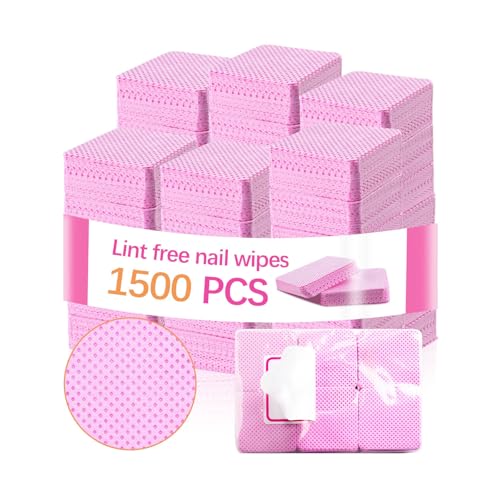
- Lint-free wipe nail polish remover
- Microfiber cleaning cloth for nail polish spills
- Nail polish stain remover brush


Before You Start
Prepare the area by ventilating the room and protecting nearby surfaces with old towels or disposable sheets. Wear gloves if you have sensitive skin, and avoid skin contact with acetone on delicate finishes. Identify the surface type: non-porous (glass, tile, sealed counters) vs. porous (fabric, wood, carpet). Time estimates vary: plan for 5–20 minutes for minor spills and longer for larger spots. Important: never mix cleaners unless the manufacturer permits it, and test a small hidden area first if you’re unsure about the surface finish.
Step-By-Step: How To Clean Up Spilled Nail Polish
- Contain the spill by blotting with a clean, dry lint-free wipe to lift excess liquid without spreading it.
- For non-porous surfaces, apply an acetone nail polish remover pad to a corner of the area, and gently dab the stain until it begins to lift.
- Switch to a fresh lint-free wipe as the stain transfers; continue dabbing rather than rubbing to avoid embedding pigment into the surface.
- For stubborn spots, use a nail polish stain remover brush to lightly agitate the border of the stain, then reblot with a clean wipe.
- On fabric or carpet, test an inconspicuous area with the cleaner first. If safe, apply a small amount of remover to the stain and blot, never saturate.
- Rinse or wipe away any residue with a damp microfiber cleaning cloth, then blot dry with a clean towel. Repeat steps if the stain persists.
- If color remains, consider using a fabric-safe stain remover designed for dye-based stains and follow the product’s directions.
- Allow the surface to dry completely, then inspect for any remaining discoloration. Launder washable fabrics if appropriate after treatment.
Troubleshooting
| Symptom | Likely Cause | Fix | Prevention |
|---|---|---|---|
| Stain persists after initial cleaning | Patched dye lingering in porous material | Apply stain remover brush with gentle agitation and repeat | Act quickly and blot; avoid rubbing |
| Color spreads beyond the border | Rubbing or over-wetting | Blot, lift, and reapply cleaner to the affected area only | Work from outside edge toward center |
| Acetone residue on hard surfaces | Excess cleaner left behind | Wipe with a damp microfiber cloth after cleaning | Use sparingly and test first |
| Fabric texture feels sticky | Over-application of remover | Blot with a clean cloth and rinse with water | Use minimal product on fabrics |
Common Mistakes
- Rubbing the stain instead of blotting, which spreads pigment.
- Using excessive amounts of solvent on fabrics or wood finishes.
- Ignoring ventilation, especially when using acetone or strong cleaners.
- Waiting too long to start cleanup, allowing deeper penetration into porous materials.
Tips For Best Results
- Keep a small kit with the listed tools for quick access during accidental spills.
- Always test cleaners on a hidden area first to avoid damage or color loss.
- For large spills on hard surfaces, work in sections to prevent spreading.
- Once the stain is removed, wipe the area with a clean, damp cloth to remove any cleaner residue.
- On delicate fabrics, consider a professional cleaning option if needed to avoid shrinkage or color loss.
Call A Professional
Seek professional help if the spill involves irreplaceable materials (antique finishes, delicate fabrics) or if the stain persists after multiple cleaning cycles. Signs to stop DIY cleaning and contact a pro include permanent discoloration, warping of wood, or persistent odor that suggests deeper penetration into the substrate.
FAQ
Can I use regular nail polish remover for fabric spills?
Only if the fabric label allows it; otherwise, use fabric-safe stain removers and follow the product directions.
Will acetone damage painted walls or glossy finishes?
Yes, acetone can dull or strip finishes. Test in a hidden spot and consider milder cleaners for painted surfaces.
Is heat safe after cleanup?
Avoid applying heat to set any remaining stain; air dry and inspect before ironing or using heat.
What if the spill is dried on vinyl or plastic?
Acetone pads can help, but test first; for tough spots, a specialized plastic-safe cleaner is recommended.
Buying Guide
The Buying Guide covers key factors that influence effectiveness and convenience when choosing cleanup products for nail polish spills. Consider these perspectives to make a confident choice.
- <bSize and coverage: Smaller kits are portable and quick for minor spills, while larger kits may include multiple applicators to handle bigger messes.
- <bNoise level: Cleaning tools like cloths and brushes are silent; if you opt for electric spill tools, check noise ratings and user reviews.
- <bEnergy efficiency: Not a major factor for manual cleanup, but if you use powered tools for staining, select energy-efficient options.
- <bControls and usability: Look for simple packaging, resealable wipes, and pre-measured pads to minimize overuse.
- <bPlacement and storage: Store the kit in a reachable, ventilated area near the laundry or cleaning supplies, not in a heat-prone cabinet.
When comparing products, consider how well each item handles different surfaces, the ease of use, and the availability of fabric-safe options. Do you frequently deal with spills on carpets or fabrics, or mostly hard surfaces? A versatile kit with both acetone pads and lint-free wipes covers most scenarios, while a dedicated fabric stain remover brush adds extra cleaning power for stubborn spots. With the right setup, nail polish spills become manageable in minutes rather than becoming a lasting stain.