Maintaining a clear sink trap is essential for preventing slow draining and unpleasant odors in kitchen spaces. This guide walks through a practical, step-by-step method to safely remove and clean a kitchen sink trap, using common tools and readily available supplies. Following these steps helps protect plumbing and avoids unnecessary calls to a professional.
Whether you’re dealing with a minor clog or routine maintenance, a well-executed trap cleaning can restore optimal drainage. The process emphasizes safety, cleanliness, and proper reassembly to ensure a leak-free seal.
Quick Answer
What you’ll do: Shut off water, place a bucket beneath the trap, loosen fittings, remove the P-trap, clean debris, reassemble, test drainage, and wipe down components.
What You’ll Need
- hand drain snake auger for kitchen sink clog
- P-trap cleaning kit with slip joint nuts and brushes
- basin wrench for removing sink trap nuts
- drain cleaning tool kit for kitchen sink
- adjustable pipe wrench for P-trap removal

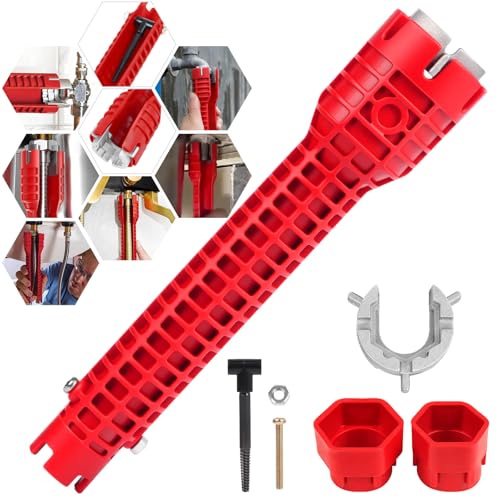
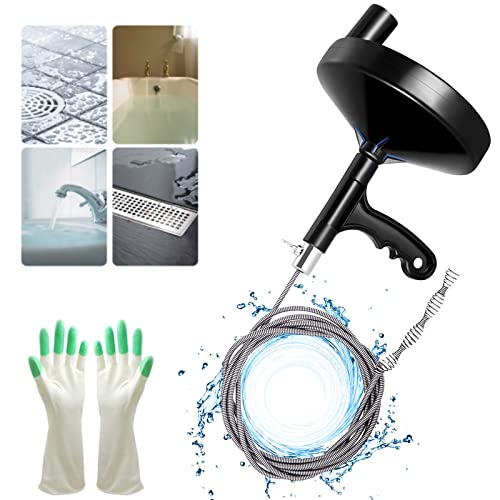
Before You Start
Before beginning, shut off the water supply to the faucet and place a bucket or bowl under the trap to catch water and debris. Clear the area around the sink to prevent tools from slipping. Protect the countertop with a cloth or mat to avoid scratches. Plan for about 30–60 minutes for the full process, depending on trap access and clog severity.
Carefully handle metal parts to avoid bending threads, and ensure the waste line is supported when removing the trap. If you encounter a stubborn clog or corroded parts, proceed with caution and consider professional help.
Step-By-Step: How To Clean A Sink Trap
- Place a bucket under the P-trap and disconnect the upper trap arm from the sink drain using a basin wrench or adjustable wrench.
- Loosen the slip joint nuts on the trap and carefully slide the trap downward to reveal the U-shaped portion and any debris inside.
- Remove the P-trap entirely and inspect both ends for buildup, using a drain cleaning tool kit for kitchen sink brushes to dislodge gunk from small passages.
- Rinse the trap with warm, soapy water, scrubbing with a brush to remove hair, soap scum, and mineral deposits. Dry and set aside for a quick visual check.
- Check the wall drain fitting inside the wall for any continuous buildup; if present, use a hand drain snake auger for kitchen sink clog to clear the line near the trap.
- Reassemble the trap with new or cleaned washers and slip joints, tightening the nuts evenly with the basin wrench to prevent leaks.
- Reconnect the trap to the sink drain arm and tighten all connections. Gently run water to test for leaks and proper drainage.
- If water still drains slowly, repeat the trap cleaning steps or progress to deeper cleaning of the drain line using the snake or auger in the main run.
Troubleshooting
| Symptom | Likely Cause | Fix | Prevention |
|---|---|---|---|
| Slow drainage after cleaning | Residual buildup in the trap or drain line | Reinspect trap and use a snake to clear further | Regular maintenance every 6–12 months |
| Leaking under the sink | Loose or damaged slip joint nuts | Tighten or replace with a new kit | Use proper sealant, avoid overtightening |
| Clog returns quickly | Main line blockage or improper reassembly | Inspect alignment; consider professional cleaning | Install astrainer and clean trap periodically |
| No water flow after reassembly | Trap installed backwards or mis-sealed | Disassemble, check orientation, reseal, and test | Label parts during disassembly for correct reassembly |
Common Mistakes
- Skipping the bucket and protective material; it leads to a messy cleanup
- Overtightening nuts, causing cracked plastic or metal threads
- Forgetting to remove all debris from the trap before reassembly
- Neglecting to test for leaks after reassembly
Tips For Best Results
- Keep P-trap cleaning kit with slip joint nuts and brushes accessible for regular maintenance.
- Use a flexible drain cleaning tool kit for kitchen sink to navigate tight bends effectively.
- Warm water with a splash of dish soap helps loosen greasy buildup during cleaning.
- Inspect washers and replace worn parts to ensure a tight seal and prevent leaks.
Call A Professional
Call a professional if you encounter:
- Corroded or damaged pipes that require replacement
- Persistent leaks after a full cleaning and reassembly
- Clogs that recur despite multiple cleaning attempts
- Unusual odors persisting after drainage work
FAQ
What tools do I need to clean a sink trap?
A basic kit usually includes a basin wrench, adjustable wrench, slip joint nuts, brushes, and a drain snake.
How often should I clean my sink trap?
With normal use, every 6–12 months helps prevent buildup and clogs.
Can I use chemical drain cleaners for a trap?
Chemical cleaners can damage pipes and seals; mechanical cleaning is preferred for traps.
What if the trap is leaking after cleaning?
Disassemble, inspect washers, ensure correct alignment, and replace worn parts before retesting.
Is it necessary to remove the trap fully?
Removing the trap allows thorough cleaning and inspection of the entire path, reducing recurring clogs.
Buying Guide
When selecting tools for cleaning a sink trap, consider size, compatibility, and durability. Questions such as “How often will I perform this task?” and “What pipe materials do I have?” influence choices. For most home kitchens in the United States, a versatile drain cleaning tool kit paired with a P-trap cleaning kit with slip joint nuts and brushes covers routine maintenance and minor clogs. Look for corrosion-resistant metals, comfortable grips, and reliable slip joints that seal well under varying temperatures. A basin wrench for removing sink trap nuts should be compact enough to reach tight spaces. Finally, ensure the kit includes a hand drain snake auger for kitchen sink clog for deeper blockages and a compatible wrench set to avoid damage during disassembly.