Limescale buildup is a common issue in many American households, especially in areas with hard water. This guide explains practical, safe methods to remove limescale from fixtures and appliances, using common tools and store-bought descalers. Clear, step-by-step instructions help you restore efficiency and appearance without damaging surfaces.
Whether you’re dealing with stubborn mineral deposits in a kettle, shower, coffee maker, or bathroom fixtures, the right approach combines chemistry, mechanical help, and consistent maintenance. The goal is to dissolve mineral scale safely and prevent quick re-accumulation through routine cleaning and proper rinse practices.
Quick Answer
Choose a targeted descaler for the affected area, apply it per the product directions, and scrub with a mild brush or sponge. For stubborn spots, use a dedicated descaling tool or scraper, then rinse thoroughly. Regular maintenance, such as monthly descaling of appliances and weekly wipe-downs of shower heads, helps prevent heavy buildup.
What You’ll Need
- limescale descaling brush kit
- coffee machine descaling kit
- shower head limescale remover tool
- kettle descaler tool and sponge
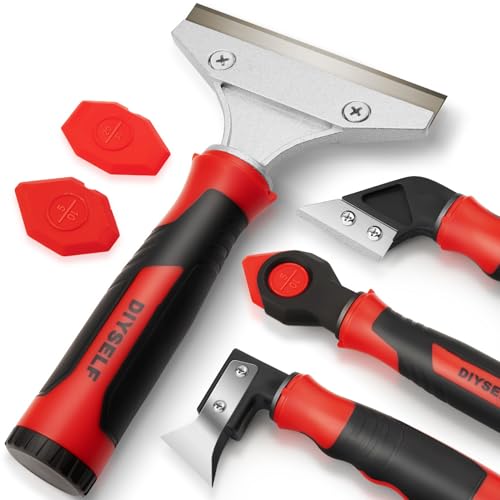
- bathroom limescale remover scraper


Before You Start
Prepare a clean, ventilated workspace and protect nearby surfaces, especially if using chemical descalers. Read product labels for safety instructions and mix ratios. Wear gloves and eye protection if recommended. Time estimates vary: plan 20–60 minutes for a single appliance, plus extra time for multiple areas. Important cautions: avoid mixing acidic descalers with bleach or ammonia, and never use metal scrubbers on delicate finishes.
Step-By-Step: How To Remove Limescale
- Identify the most affected area, such as a kettle, coffee maker, shower head, or bathroom fixtures.
- Rinse the item with warm water to loosen surface scale and remove loose debris.
- Apply the appropriate descaling product according to its label. For appliances, use the coffee machine descaling kit or kettle descaler tool as directed.
- For built-up spots, use the limescale remover brush kit or bathroom limescale remover scraper to gently lift scale without scratching.
- Let the solution sit for the recommended time, then scrub with a non-abrasive sponge or soft brush to dislodge deposits.
- Rinse thoroughly with clean water, flushing internal passages in appliances to remove residue.
- Repeat on stubborn areas if needed, ensuring all residues are fully rinsed before returning to service.
- Dry surfaces completely to minimize future buildup; wipe showers and fixtures after use when possible.
- For ongoing prevention, schedule monthly descaling for appliances and weekly wipes for fixtures with mineral buildup.
- Inspect seals and gaskets for wear after descaling and replace any damaged components to maintain efficiency.
- Store descalers in a cool, dry place and label tools to avoid cross-contamination between products.
- Document a simple maintenance routine to ensure consistent results over time.
Troubleshooting
| Symptom | Likely Cause | Fix | Prevention |
|---|---|---|---|
| Continued scale after descaling | Insufficient contact time or wrong product | Reapply and extend dwell time per label; use a more powerful descaler if needed | Regular maintenance; use descalers monthly for appliances |
| Rusty or dull finish after cleaning | Scrubbing with abrasive tools | Switch to non-abrasive brushes; rinse thoroughly | Gentle scrubbing and immediate rinse after use |
| Discolored water after descaling | Descaler residue | Flush repeatedly with clean water until clear | Follow manufacturer instructions for final rinse |
| Scale returns within days | Hard water and high mineral content | Increase frequency of cleaning; consider water conditioner | Regular preventive upkeep and filter use |
Common Mistakes
- Using abrasive pads on delicate surfaces, causing scratches.
- Mixing acidic descalers with bleach or ammonia, creating toxic fumes.
- Skipping a thorough rinse, leaving residues that attract more scale.
- Neglecting to dry surfaces after cleaning, promoting new deposits.
Tips For Best Results
Choose a descaler formulated for the specific item to avoid damage. For faucets and showerheads, pre-soak metal parts briefly to help release minerals. Maintain a simple monthly routine: wipe down surfaces after use, descale appliances as recommended, and replace worn washers or seals to keep flow efficient.
Consider using a water-conditioning filter or installing a softening system if hard water is persistent in the home. When using multiple products, designate separate tools for different areas to prevent cross-contamination of cleaners. If you’re unsure about an appliance’s compatibility with descalers, test on a small inconspicuous area first.
Call A Professional
Stop and call a pro if you notice persistent mineral buildup despite repeated cleaning, if scale affects appliance performance, or if you encounter mineral staining on delicate finishes. Seek professional help for high-pressure shower systems, gas appliances, or electrical components where improper descaling could pose safety risks.
FAQ
What is the best descaler for hard water?
Look for a product labeled for limescale removal that is compatible with your surface and appliance. For appliances, use a dedicated coffee machine descaling kit or kettle descaler tool as directed.
Can I use home remedies to remove limescale?
Yes, a vinegar- or citric-acid solution can work on some surfaces, but avoid prolonged exposure on certain metals or finishes. Always follow product guidelines and test first.
How often should I descale coffee machines?
Most machines benefit from a monthly descaling cycle, or as recommended by the manufacturer. Heavily used machines in hard water areas may need more frequent treatment.
Is limescale harmful to health?
Limescale itself is not typically harmful, but mineral buildup can affect appliance efficiency and water taste. Regular cleaning helps maintain performance and water quality.
Can limescale affect my shower’s water pressure?
Yes, heavy deposits can constrain flow. Descale the shower head to restore optimal pressure and spray pattern.
Should I replace the shower head if scale is severe?
Severely encrusted heads may require replacement if descaling cannot restore full function or if deposits corrode components.
What about using a descaler on metal finishes?
Use gentler, non-abrasive products and follow manufacturer guidance to prevent tarnish or damage.
Buying Guide
When selecting descaling products or tools, consider several factors to fit household needs and preferences.
- Size and compatibility: Choose descalers and tools designed for the target area—kettles, coffee makers, showers, or bathroom fixtures.
- Effectiveness: Look for products proven to dissolve mineral deposits without harming surfaces. Some kits include brush heads or scrapers for stubborn spots.
- Ease of use: Simple dwell times and clear instructions help ensure consistent results across tasks.
- Safety: Check for safe handling guidance, especially for acidic formulations and enclosed appliances.
- Maintenance impact: Consider how often you’ll descale and whether you want tools that support regular upkeep.
- Surface compatibility: Confirm whether the product is suitable for chrome, plastic, enamel, glass, or metal finishes.
- Cost and availability: Balance upfront costs with long-term value, and verify availability of replacement parts like brushes or sponges.
- Noise and energy: While not heavy in consumer use, some kits have smaller, quieter components; energy considerations mainly apply to appliances during descaling cycles.
With the right approach, removing limescale becomes a straightforward task that extends appliance life and preserves the look of fixtures. Ready to tackle mineral buildup with targeted tools and proven methods?