Keeping a car’s headliner clean extends the interior’s look and value. This guide provides practical, step-by-step methods suited for typical passenger vehicles, using common cleaning tools and careful techniques to avoid damage.
Headliners are delicate, and improper cleaning can cause sagging, staining, or fiber distortion. The approach below emphasizes gentle products, spot treatment, and safe methods that work for most fabrics found in modern vehicles.
Quick Answer
Best initial method: use a microfiber brush and a light upholstery spray to lift stains, then extract moisture with a portable car vacuum. For stubborn stains, switch to a steam cleaner attachment, and always test a small, inconspicuous area first.
What You’ll Need
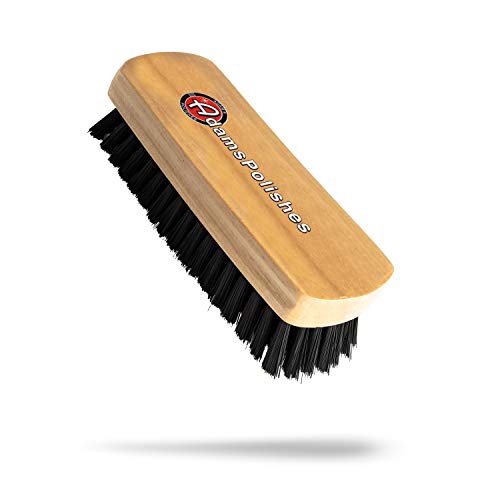
- Car headliner cleaning kit microfiber brush
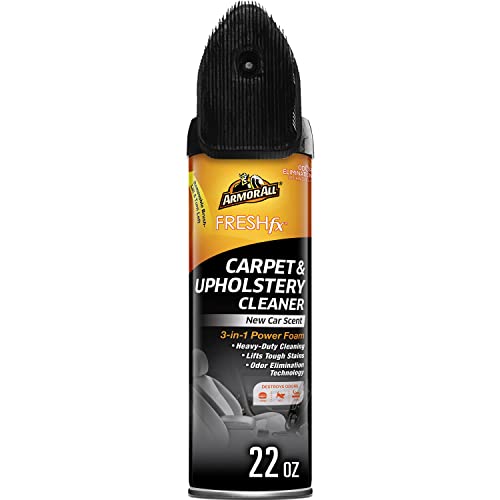
- Auto upholstery stain remover spray for headliner
- Portable car vacuum with upholstery nozzle
- Steam cleaner attachment for car interior
- Microfiber detailing cloths for car headliner

Before You Start
Before cleaning, ensure the car is in a well-ventilated area and the engine or AC is off to prevent dust recirculation. Do a quick test on a hidden spot to verify that the fabric does not bleed or pill. Use a light spray and avoid saturating the fabric, as excess moisture can lead to headliner sagging or adhesive damage. Plan for a 20–40 minute window depending on stain intensity and air circulation. Never scrub aggressively; gentle motions maximize lift without fiber distortion.
Step-By-Step: How To Clean A Car Headliner
- Prepare the area: Remove loose dust with the portable car vacuum’s upholstery nozzle, focusing on edges and seams.
- Dry pre-clean: Gently brush the headliner with a microfiber brush to loosen surface dirt without pushing it into fibers.
- Spot test: Dampen a microfiber cloth with water, then blot a hidden area to confirm colorfastness and fabric integrity.
- Apply stain remover: Lightly spray the auto upholstery stain remover spray for headliner on stained spots. Do not saturate; aim for a fine mist that dampens only the target area.
- Blot, don’t rub: Use a microfiber detailing cloth to blot the treated areas in small circular motions, lifting stain particles toward the cloth.
- Use the brush strategically: For stubborn spots, gently work the cleaning solution with the car headliner cleaning kit microfiber brush in a lifting motion, staying within the fabric’s nap direction.
- Extract moisture: Run the portable vacuum with upholstery nozzle over the treated areas to remove moisture and loosened debris as the fabric dries.
- Steam assist (optional): If stains persist, use a steam cleaner attachment for car interior held at a safe distance and move steadily to avoid oversaturation.
- Drying check: Feel for dampness and ensure the headliner dries evenly. If still slightly damp, leave the car doors open or run a fan to speed up evaporation.
- Final wipe-down: Lightly dust with a dry microfiber cloth to restore nap and remove any remaining residue.
- Inspect and repeat if needed: For persistent stains, repeat the targeted steps on the affected area only.
Troubleshooting
| Symptom | Likely Cause | Fix | Prevention |
|---|---|---|---|
| Stains remain after cleaning | Deep-set or oil-based stain | Apply stain remover again, then blot with a clean cloth; consider steam carefully | Avoid applying cleaners directly to large areas |
| Headliner sagging after cleaning | Excess moisture or adhesive failure | Allow thorough drying; use fans; do not over-saturate | Test spot first; control spray amount |
| Bleeding color on test patch | Non-colorfast fabric | Stop using stain remover; switch to milder method or seek professional help | Always test before broad application |
| Discolored nap after cleaning | Over-brushing or harsh cleaners | Switch to gentler strokes and milder solutions | Use the brush lightly and keep moisture minimal |
Common Mistakes
- Using excessive moisture, which can cause sagging or mold growth
- Scrubbing too hard, leading to fabric fibers fraying
- Choosing highly concentrated cleaners that bleed color
- Overlooking hidden stains near seams and vents
Tips For Best Results
- Work in small sections to maintain control over moisture and cleaning solution placement
- Always start with the mildest cleaner and the lightest touch
- Keep a dedicated microfiber brush and cloth for headliner use only to avoid cross-contamination with harsher detailing products
- Ventilate the cabin during and after cleaning to speed evaporation and reduce odors
- Regular light maintenance prevents buildup; consider routine quick cleanings with the vacuum and brush
Call A Professional
Seek professional help if the headliner shows significant sagging, water damage, or large, stubborn stains that do not respond to standard cleaning. Signs to contact a pro include persistent odor, moisture behind the fabric, or adhesives that appear compromised near sunroofs or overhead consoles. If the fabric is splitting or adhesive layers are failing, professional reupholstery or headliner replacement might be the most reliable long-term option.
FAQ
Can I use household cleaners on a car headliner?
Use only products labeled safe for automotive fabrics and test on a hidden area first. Household cleaners can leave residues or discolor fabrics.
Is it safe to use steam on a headliner?
Steam can help with tough stains but must be used carefully to avoid saturating the fabric. Maintain distance and monitor moisture closely.
How can I prevent headliner stains in the future?
Address spills quickly, use protective sprays designed for fabrics, and avoid eating and drinking in the front seats when possible.
What if my headliner keeps sagging after cleaning?
Moisture infiltration or adhesive damage is often the cause; professional inspection may be required, especially for sagging that recurs after drying.
Buying Guide
When selecting tools and products for cleaning a car headliner, consider several factors to match your vehicle and cleaning goals.
Size and coverage: For compact cars, a small cleaning kit with a compact vacuum and a few brushes is usually sufficient. Larger SUVs may benefit from a full kit with multiple detailing cloths and a versatile steam attachment.
Noise level: Portable vacuums and steamers vary in noise. If the vehicle is frequently shared or used for quiet rides, choose models known for lower decibel operation.
Energy efficiency: Look for energy-efficient vacuums and steam cleaners with heat-up times suited to quick cleanups and extended detailing sessions without excessive power use.
Controls and simplicity: A straightforward, easy-to-clean spray nozzle and clear indicator lights help prevent over-saturation and misapplication of cleaners.
Placement and storage: Favor compact kits that can be stowed in the trunk or center console. Keep dedicated microfiber tools together to avoid cross-contamination.
Compatibility: Confirm that the upholstery stain remover spray is safe for automotive fabrics and compatible with your car’s headliner material.
With thoughtful selection, vehicle interiors stay cleaner longer and headliners retain their appearance. Does your cleaning setup include a dedicated headliner tool kit and protective cloth system to guard against accidental staining?