Cracks and gaps in hardwood floors can detract from appearance and affect performance. This guide provides practical steps for selecting appropriate crack fillers, preparing the surface, applying materials, and ensuring a durable, seamless result. It covers both traditional fillers and flexible sealants to accommodate seasonal movement and high-traffic areas.
Quick Answer
Choose a filler that matches the wood finish and movement of your floor. For small cracks, use a flexible wood floor caulk or a specialized epoxy kit; for larger gaps, a dedicated crack filler epoxy kit or engineered hardwood repair kit works best. Apply, smooth, and feather to blend with the floor, then allow proper cure time before light foot traffic.
What You’ll Need
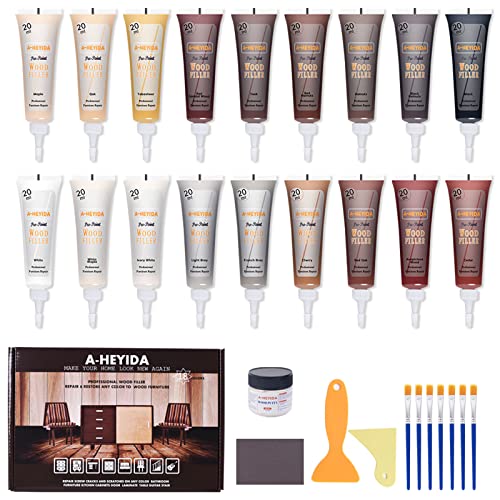
- Wood floor crack filler epoxy kit 8oz
- Urethane wood floor crack filler for hardwood
- Hardwood floor gap filler caulk 30ft cartridge
- Engineered hardwood repair kit crack filler
- Flexible wood floor caulk for cracks and joints


Before You Start
Assess the crack or gap depth and width. Remove loose debris with a vacuum or soft brush. If the floor is newly finished, wait for the finish to cure before applying fillers. Work in a well-ventilated area and wear a dust mask if sanding is involved. For safety, protect nearby cabinetry and baseboards with painter’s tape. Time estimates vary by product; plan for several hours to cure before turning furniture back.
Critical cautions: avoid overfilling, which can cause joint stiffness or uneven surfaces. Test the filler on a hidden area to confirm color match and adhesion before full use.
Step-By-Step: How To Fill Cracks In Hardwood Floors
- Prepare the surface by cleaning the cracks and surrounding area with a vacuum and a damp cloth. Ensure the floor is dry before applying any filler.
- Choose the appropriate product based on crack size and movement. For narrow, flexible gaps, use flexible wood floor caulk; for wider gaps or structural movement, select an epoxy kit or engineered hardwood repair kit.
- Cut the nozzle of caulking products to match crack width, if using a cartridge. Load the cartridge into a caulking gun and place the tip at the crack edge.
- Apply the filler evenly along the crack, filling slightly above the surface to account for sanding and leveling. For epoxy or repair kits, mix per manufacturer instructions before application.
- Spread and smooth the filler using a plastic spreader or a credit card, working along the grain to minimize texture differences.
- Wipe away excess material with a damp cloth before it cures. If using a sanding finish, allow the compound to set according to the product’s cure time.
- Lightly sand the filled area once fully cured to create a flush surface. Use fine-grit sandpaper and blend the edges into surrounding wood.
- Inspect the repaired area. If any gaps remain, apply a second thin coat and re-sand after curing.
- Refinish or recoat the repaired area to match the rest of the floor, ensuring color consistency across the surface.
- Clean the adjacent area and replace furniture cautiously after the finish has fully cured.
- Document the repair for future maintenance, noting product type, color, and cure times for reference in future seasonal moves.
Troubleshooting
| Symptom | Likely Cause | Fix | Prevention |
|---|---|---|---|
| Filler cracks reopen after curing | Excess movement or poor adhesion | Remove, clean, and reapply with a more flexible product | Choose caulk or flexible epoxy designed for movement |
| Color mismatch | Incorrect product or improper mixing | Test color match on a hidden area; adjust with additional stain or finish | Sample in advance; follow color-matching guidelines |
| Rough surface after sanding | Over-sanding or uneven application | Use fine-grit sandpaper and feather edges | Apply thin layers and smooth evenly |
| Cracks appear around repaired area | Natural wood movement beyond product capacity | Reassess filler choice; add more flexible sealant in joints | Monitor seasonal changes and re-treat if needed |
Common Mistakes
- Using a hard-set filler for areas that move with humidity and temperature changes
- Overfilling cracks, causing raised ridges that trap dirt
- Not curing the filler fully before light use or finishing steps
- Failing to match color or sheen with the surrounding wood finish
Choosing the right product for the specific crack size and movement is essential. A mismatched filler often leads to repeated repairs and unsatisfactory results.
Tips For Best Results
- Test color and texture on a hidden section of the floor before full application.
- Work in sections to prevent filler from drying prematurely.
- Choose a flexible caulk for seasons with large wood movement and high humidity swings.
- Follow manufacturer cure times exactly to avoid soft spots under foot traffic.
Call A Professional
Consider contacting a flooring professional if cracks are paired with sagging boards, loose tongue-and-groove joints, or substantial structural movement. Stop signs include large gaps greater than 1/4 inch, cracking that runs along multiple planks, or repeated openings after repairs. A pro can assess subfloor conditions and advise on wood replacement or more advanced repair methods.
FAQ
What is the best crack filler for hardwood floors?
The best option depends on crack size and movement; flexible caulk or epoxy-based kits for floors are common choices.
How long does it take for fillers to cure?
Cure times vary by product; follow the manufacturer’s guidelines for handling and refinishing.
Can I refinish the floor after filling cracks?
Yes, refinish after the filler has fully cured to blend color and texture with the surrounding wood.
Do I need to sand between coats?
Light sanding between coats is often beneficial if applying multiple layers, but follow product instructions.
Buying Guide
When selecting products to fill cracks in hardwood floors, consider several key factors to ensure a durable and visually seamless result.
- Size and type of crack: Thin cracks may respond to flexible caulk, while wider gaps or movement require epoxy or engineered hardwood repair kits.
- Movement tolerance: Floors experience seasonal shifts; choose products labeled for expansion and contraction to prevent future opening.
- Finish compatibility: Match the cured filler with the floor’s stain and clear finish to minimize color differences.
- Application ease: Cartridge caulks are quick for narrow gaps, while epoxy kits offer stronger adhesion for larger repairs.
- Drying and curing times: Evaluate how soon the floor can be used again and when refinishing can begin.
- Durability for traffic: High-traffic rooms benefit from more durable fillers designed for wear resistance.
- Color control: Some products accept stain post-curing; others are pre-tinted to approximate wood tones.
- Installation environment: Ensure proper ventilation during application, especially with solvent-based products.
Think about whether you prefer a quick, simple fix or a robust solution that accommodates future movement. If in doubt, start with a flexible caulk or a small epoxy kit to address typical cracks without committing to a major repair.