Hydrogen peroxide is a versatile, user-friendly option for brightening and sanitizing grout in kitchens, bathrooms, and laundry areas. This guide explains safe, effective methods for using hydrogen peroxide alone or with simple partners like baking soda. By following practical steps, homeowners can restore grout color, reduce mold, and maintain a clean, fresh-looking tile surface without harsh chemicals.
Quick Answer
For most grout cleaning tasks, dampen the grout lines and apply a hydrogen peroxide solution or a ready-to-use cleaner. Let it fizz gently, scrub with a stiff brush, rinse, and dry. For stubborn stains, combine hydrogen peroxide with baking soda to form a cleaning paste. Repeat as needed for the best whitening and disinfection results.
What You’ll Need
- 3% hydrogen peroxide grout cleaner spray
- hydrogen peroxide grout stain remover gel
- baking soda hydrogen peroxide grout cleaning paste
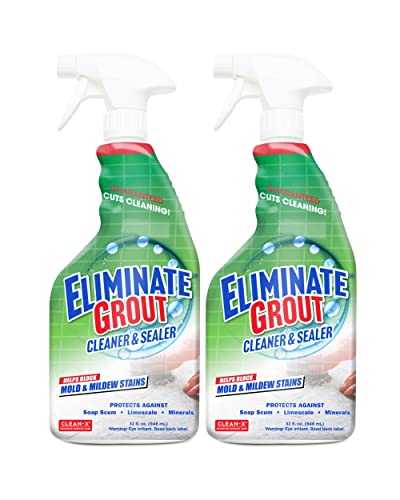
- oxygen bleach grout cleaner hydrogen peroxide 32 oz
- grout whitening with hydrogen peroxide spray pen

Before You Start
Protect adjacent surfaces and wear gloves to minimize skin contact with hydrogen peroxide. Ventilate the area well and test a small, inconspicuous section of grout before full application. For colored or delicate grouts, use the gentlest method first and avoid prolonged contact that could etch or bleach the tile. Time estimates vary by grout condition; plan for 30 minutes to 2 hours, including dwell and scrubbing. Never mix hydrogen peroxide with ammonia, vinegar, or bleach.
Step-By-Step: How To Clean Grout With Hydrogen Peroxide
- Clear the area and remove loose debris from the grout lines with a dry brush or vacuum.
- Apply a 3% hydrogen peroxide grout cleaner spray directly to the grout or spray onto a cleaning sponge.
- Let the solution sit for 5–10 minutes to allow bubbling and oxidization to loosen dirt.
- Scrub the grout with a stiff nylon brush, working in small sections to prevent over-wetting surrounding tiles.
- If stains persist, apply hydrogen peroxide grout stain remover gel to the affected areas and scrub again.
- For heavy staining, mix a paste of baking soda and hydrogen peroxide, spread across grout lines, and let sit 10–15 minutes before scrubbing.
- Rinse thoroughly with clean water and wipe away any residue with a dry cloth or towel.
- Repeat as needed on heavily soiled grout; for whitening, follow with a grout whitening spray pen on dry, clean grout.
- Dry the surface completely to prevent mold growth; use a fan or open window if necessary.
- Inspect lines for uniform color. If some grout still looks dark, repeat the process on those sections.
- Store unused hydrogen peroxide products in a cool, dark place away from direct sunlight and heat.
Troubleshooting
| Symptom | Likely Cause | Fix | Prevention |
|---|---|---|---|
| Grout still discolored after cleaning | Deep-set stains or sealant residue | Use a stronger paste with baking soda and longer dwell time | Seal grout after cleaning to slow future staining |
| Tile edge whitening or color change | Overexposure or improper concentration | Switch to 3% hydrogen peroxide and shorter dwell times | Test area before full application |
| Streaks or residue | Incomplete rinsing | Rinse and wipe thoroughly with a damp cloth | Rinse sections as you go |
| New mold growth soon after cleaning | moist environment, insufficient drying | Increase ventilation and dry thoroughly | Keep bathroom surfaces drier with a fan |
Common Mistakes
- Using bleach-based products with hydrogen peroxide, which creates dangerous fumes
- Applying cleaners directly to very porous or fragile grout without a test
- Over-wetting grout, which can push water behind tiles and loosen adhesive
- Skipping drying, which encourages quick mold return
Careful testing and proper rinsing help avoid common missteps and ensure grout remains bright and intact.
Tips For Best Results
- Always start with the gentlest method: a spray cleaner or light paste before moving to stronger formulas.
- Use a dedicated grout brush or a stiff-bristled toothbrush for targeted scrubbing.
- Work in small sections to prevent the peroxide from drying out before scrubbing.
- For large areas, consider mixing a larger batch of baking soda paste to cover multiple grout lines efficiently.
- After whitening, seal the grout to reduce future staining and moisture penetration.
Call A Professional
Consult a professional if grout shows deep structural damage, loose tiles, or persistent staining despite repeated cleaning. Seek immediate help if you notice chemical reactions, unusual odors, or significant discoloration that could indicate underlying mold growth or water damage.
FAQ
Is hydrogen peroxide safe on colored grout?
In most cases, 3% hydrogen peroxide is safe for colored grout, but always test a small area first to confirm color stability.
How long should hydrogen peroxide sit on grout?
Typically 5–10 minutes for standard cleaning; longer dwell times may be needed for stubborn stains, but avoid extended exposure on delicate grout.
Can I mix baking soda with hydrogen peroxide for grout cleaning?
Yes, a baking soda and hydrogen peroxide paste is a common, effective option for tough stains.
Will hydrogen peroxide whiten my grout permanently?
Hydrogen peroxide can brighten grout, but staining returns without proper sealing and maintenance.
Are there safety concerns with mixing products?
Avoid mixing hydrogen peroxide with ammonia, vinegar, or bleach to prevent hazardous reactions.
How often should grout be cleaned to maintain whiteness?
Regular spot cleaning every few weeks helps maintain brightness; perform a thorough cleaning every few months as needed.
Buying Guide
When choosing hydrogen peroxide-based grout cleaners, consider several factors to match the cleaning needs and tile type. First, assess grout color and porosity; the lighter and more porous the grout, the more noticeable whitening will be. Second, evaluate the cleaning strength: ready-to-use sprays work for routine maintenance, while gels and pastes target heavy stains.
Key buying factors include size and containment, convenience of application, and surface compatibility. Look for products labeled for bathroom and kitchen grout to ensure mold-fighting capabilities and safe tile use. Noise and energy are not primary concerns here, but consider refill availability and shelf life. Choose products that clearly instruct proper use, safety precautions, and tested results on grout similar to your tiles.
For best results, consider pairing a hydrogen peroxide spray with a baking soda paste for stubborn grout and a whitening spray pen for touch-ups. Always follow the manufacturer’s directions and use a test patch before broad application. Do you prefer spray-on convenience or paste-based power for tough stains?