Cloudy plastic surfaces can diminish clarity and appearance, whether on vehicle lights, home fixtures, or electronics. This guide explains safe, practical steps for restoring transparency without damaging the material. By following a proven process and using dedicated polish kits, you can reduce scratches and restore shine efficiently.
Quick Answer
To quickly address cloudiness, start with a specialized plastic cleaner and polish, then apply a gentle polishing compound designed for plastics. If mild scratches remain, use a polycarbonate plastic scratch remover kit. Finish with a microfiber cloth to buff to a clear, glossy surface. For larger or stubborn areas, a dedicated headlight restoration kit can help, followed by routine maintenance with a plastic surface cleaner and polish spray.
What You’ll Need
- Plastic lens cleaner polish kit
- Polycarbonate plastic scratch remover kit
- Headlight restoration kit with polishing compound microfiber cloth
- Microfiber cleaning cloth for plastic polishing 16×16
- Plastic surface cleaner and polish spray 12 oz
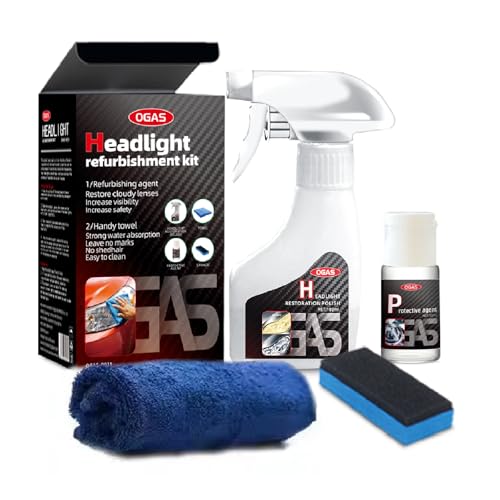


Before You Start
Working in a shaded area helps prevent rapid drying and streaks. Test any product on a small, inconspicuous area first to ensure compatibility with the plastic type. Protect surrounding surfaces to avoid accidental abrasion. Time estimates vary by extent of cloudiness, typically 30–60 minutes for light work and up to a few hours for heavy oxidation.
Safety notes: wear eye protection and gloves when using chemical polish or cleaners. Avoid abrasive tools on delicate lenses, decals, or coatings. If the plastic is severely cracked or pitted, consider professional evaluation before attempting restoration.
Step-By-Step: How To Clean Cloudy Plastic
- Clean the surface with a dedicated plastic surface cleaner and polish spray to remove dust and oils.
- Dry thoroughly with a clean microfiber cloth to prevent water spots.
- Apply a plastic lens cleaner polish kit or a comparable polishing agent in a gentle, circular motion.
- Buff the area with a soft microfiber cloth, checking for improved clarity after each pass.
- If cloudiness persists, use a polycarbonate plastic scratch remover kit following the manufacturer’s directions for micro-scratches.
- Reapply cleaner and polish, then buff again with a microfiber cloth until the surface looks clearer.
- For larger surfaces, work in small sections to maintain consistent results.
- Finish with a final wipe using the microfiber cloth to remove any residue.
- Optional: Treat frequently with a dedicated spray to maintain clarity and slow future oxidation.
- Inspect edges and corners for missed spots; repeat steps as needed for uniform shine.
- Store products per label instructions and keep the area dry after use.
Troubleshooting
| Symptom | Likely Cause | Fix | Prevention |
|---|---|---|---|
| Persistent haze after polishing | Deeper oxidation or heavy scratches | Use a dedicated scratch remover kit and repeat steps | Limit exposure and clean regularly |
| Streaks or swirl marks | Improper buffing or dirty cloth | Switch to a clean microfiber and buff with light pressure | Use a microfiber cloth from the start |
| Cloudiness returns after a few weeks | Surface protection worn off | Reapply a protective plastic spray or polish | Schedule periodic maintenance |
| Scratches worsen near edges | Rubbing too aggressively | Lighten pressure and work in circular motions | Avoid using hard tools on edges |
Common Mistakes
- Overusing abrasive compounds that create new scratches
- Using household cleaners not formulated for plastic
- Failing to dry the surface before polishing, causing streaks
- Polishing too aggressively in one area instead of moving steadily across the surface
- Overlooking edges and corners where cloudiness often hides
Tips For Best Results
- Work in a shaded area to prevent rapid drying and streaking
- Test products on a small patch before full application
- Use a high-quality microfiber cloth to minimize micro-scratches
- Maintain consistent pressure and motion during polishing
- Follow with a protective spray to slow future clouding
Call A Professional
If the plastic shows deep cracks, severe discoloration, or if the item is critical (such as vehicle headlights affecting visibility), consult a professional. Stop-and-go restoration can sometimes worsen damage. Seek expert assessment especially when safety components are involved.
FAQ
Can cloudy plastic be permanently fixed?
Most cloudiness can be significantly improved with proper cleaning and polishing, but severe oxidation or deep scratches may require replacement or professional refinishing.
Are any household items safe for plastic polishing?
Household cleaners often contain harsh solvents that can haze or scratch plastic; use products formulated for plastics or specifically labeled for polycarbonate or acrylic surfaces.
How long does a typical restoration take?
Light cloudiness often takes 30–60 minutes; heavier cases may require 1–3 hours plus cure time for any coatings used.
Will polishing affect the plastic’s strength?
Polishing with proper tools and gentleness generally preserves surface integrity; avoid aggressive abrasion that can thin or weaken the material.
Should I seal the plastic after cleaning?
Yes, applying a protective spray or polish designed for plastic helps maintain clarity and resists future oxidation.
Is a headlight restoration kit appropriate for other plastic surfaces?
Many components share similar plastics; select a kit compatible with the specific material (polycarbonate or acrylic) for best results.
What maintenance is recommended to prevent cloudiness?
Regular cleaning with a plastic-safe cleaner and periodic polishing will slow clouding and preserve clarity.
Can I restore plastic lenses on a motorcycle or car at home?
Yes, with the right kit and careful technique; however, pay attention to safety and consider professional help for critical lighting components.
Buying Guide
When choosing products to tackle cloudy plastic, consider several factors to balance effectiveness and ease of use:
- Size and scope: For small items, a compact kit may suffice; larger areas benefit from sprays and larger cloths.
- Noise level and ease of use: Some manual polishes require more effort; look for user-friendly kits with clear instructions.
- Energy efficiency isn’t relevant to polishing products, but choose formulations that minimize waste and require fewer passes.
- Controls and application: Kits with pre-sized pads, microfiber cloths, and step-by-step guides help ensure consistent results.
- Placement considerations: Work in a shaded, well-ventilated area; protect nearby surfaces to avoid accidental damage.
- Material compatibility: Confirm whether the plastic is acrylic, polycarbonate, or another type to select the proper polish and scratch remover.
- Durability of finish: Some products leave a protective coating; others require periodic reapplication for long-term clarity.
- Cost of consumables: Factor in replacement cloths and sprays for ongoing maintenance.
By evaluating these factors, consumers can select a kit that matches their project size, material type, and maintenance preferences. Ready for clearer plastic? A well-chosen kit and consistent care can restore visibility and extend the life of plastic components.