Oxidized copper, with its characteristic patina or darkened sheen, can be restored to a bright, warm finish using common household tools and purpose-made copper care products. This guide outlines practical, step-by-step methods for safely removing oxidation and bringing back copper’s natural luster while preserving the metal.
Quick Answer
Begin with a gentle cleaning using a copper tarnish remover paste or a copper cleaning and polishing kit. For tougher oxidation, a copper wire brush set or handheld copper cleaning brush provides targeted scrubbing. Finish with a soft cloth and a dedicated polishing kit to seal the shine. Always test on a small area first and follow safety guidelines for your tools.
What You’ll Need
- Copper tarnish remover paste for polishing copper
- Copper cleaning and polishing kit with cloth and paste
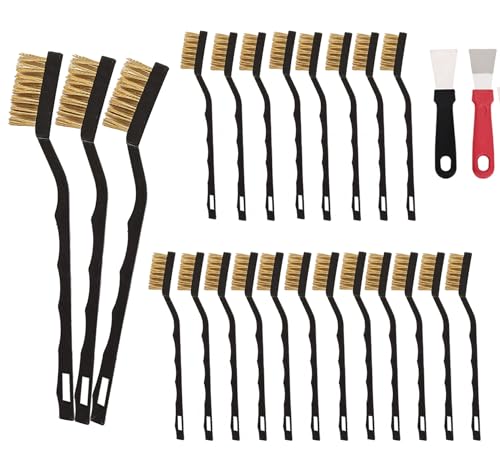
- Brass copper wire brush set for oxidation removal
- Handheld copper cleaning brush set for oxidation
- Dremel copper polishing kit with felt wheel


Before You Start
Protect surrounding surfaces with a drop cloth or newspaper. Work in a well-ventilated area and wear gloves to protect your skin from cleaning agents. For delicate items, test on an inconspicuous area first to ensure no surface damage occurs. Time estimates vary by item size and contamination, typically 15–45 minutes for a standard household piece.
Critical cautions: Avoid acidic cleaners on valued antiques without professional guidance. Do not use metal brushes on patinated bronze or brass that you intend to preserve. If the piece has a lacquer coating, consider polishing methods that preserve or remove the coating appropriately.
Step-By-Step: How To Clean Oxidized Copper
- Prepare the work area and choose a cleaning method based on the oxidation level. For light tarnish, a paste or polishing kit may suffice.
- Apply a small amount of copper tarnish remover paste to a soft cloth or the included applicator. Gently rub the surface in circular motions to lift the oxidation.
- Wipe off the paste with a clean cloth to assess progress. If tarnish remains, proceed with a second application or switch to a handheld copper cleaning brush for targeted areas.
- For stubborn oxidation, use a brass copper wire brush set in light, controlled strokes. Avoid excessive pressure that could scratch the copper surface.
- For intricate shapes or crevices, use a handheld copper cleaning brush set to reach tight spots, ensuring even coverage across the piece.
- If using a Dremel copper polishing kit, attach the felt wheel and run at a low speed. Apply a small amount of polishing paste and work evenly, stopping if you notice overheating or discoloration.
- Buff the surface with a clean, soft cloth until a natural, warm shine emerges. Reapply polish if needed for a deeper glow.
- Wipe away any residue and examine the finish. For a long-lasting result, follow with a protective polish or wax designed for copper, and allow to cure per product instructions.
- Repeat maintenance steps periodically to prevent heavy buildup. Store cleaning tools clean and dry to avoid rust or corrosion on metal brushes.
- Return the piece to its display or functional setup, ensuring any moving parts are free of debris and wash water has fully dried.
- For complex pieces or heirlooms, seek professional care if the finish appears etched, damaged, or if patina is a desired feature that you want to preserve.
Troubleshooting
| Symptom | Likely Cause | Fix | Prevention |
|---|---|---|---|
| Surface looks blotchy after cleaning | Uneven paste application or residue | Reapply paste evenly and buff with a clean cloth | Use thin, even coats; wipe excess promptly |
| Scratches appear after brushing | Abrasive brush used too aggressively | Switch to softer application or reduce pressure | Test on a hidden area first |
| Oxidation returns quickly | Protective layer not applied or cleaning too aggressive | Apply a copper-specific protective polish or wax | Regular maintenance and gentle cleaning |
| Discoloration from heat during polishing | Overheating the metal | Stop, allow to cool, reduce speed or pressure | Use low-speed settings and short bursts |
Common Mistakes
- Using overly harsh abrasive tools on delicate copper surfaces
- Over-wetting items that have cracks or joints
- Mixing cleaning agents that may react negatively (especially acids with ammonia-based products)
- Neglecting to test cleaners on a hidden area before full application
Tips For Best Results
- Choose a cleaner that matches the oxidation level; light tarnish responds to polish alone while deep patina may need brushing and paste.
- Test on an inconspicuous spot to avoid accidental damage or unwanted patina removal.
- Work in a consistent direction during polishing to achieve an even finish.
- Finish with a protective coating or wax to slow re-oxidation and keep shine longer.
- Keep tools dry and clean; store brushes in a dry place to avoid rusting.
Call A Professional
Seek professional help if copper items are antique, valuable, or have complex engravings, thin walls, or lacquered finishes that require careful, specialized care. Stop and consult a metalrestoration professional when there is suspicious corrosion, verdegris in hidden crevices, or structural concerns.
FAQ
Can I clean copper with regular household cleaners?
Use cleaners formulated for copper or metal polishing kits to avoid chemical reactions that could damage the surface.
Is it safe to use a Dremel on all copper items?
Only on non-delicate pieces and at low speed with light pressure; test first on a hidden area.
How often should copper be cleaned to maintain shine?
Light maintenance every few months keeps oxidation under control; more frequent cleaning may be needed in humid environments.
What should I do with a patina I want to preserve?
Avoid abrasive methods and consult a professional about preserving patina or applying a protective coating.
Buying Guide
When selecting copper cleaning supplies, consider size, oxidation level, and finish you want to achieve. Questions to ask: Do you prefer a paste-based approach or a comprehensive polishing kit with cloths? Is a brush set needed for hard-to-reach areas? Consider these factors for a balanced setup:
- Size and scope: For large bowls or statues, a robust kit with larger cloths and a multi-step paste may be more efficient; for small decorative items, a paste and soft cloth suffice.
- Noise level: Power tools like Dremel can be effective but generate noise; use at low speeds or manual methods for quiet operation.
- Energy efficiency: Manual cleaning uses no electricity; if using a powered wheel, look for energy-efficient models with variable speed.
- Controls and ease of use: Kits with simple, clearly labeled pastes and cloths reduce mistakes and waste.
- Placement: For items on display, a gentle finish with protective coating may be preferred; for functional pieces, ensure grip and non-slip surfaces are preserved.
By weighing these factors, users can choose a setup that matches their skill level and copper care needs, ensuring safe and effective oxidation removal without overprocessing the metal. If in doubt, start with a smaller kit and gradually add tools as comfort grows. This approach minimizes waste and maximizes results on American household copper items.