Wax spills or drips on walls are common in kitchens, living rooms, and near candle displays. The right approach removes wax without damaging paint or wallpaper. This guide outlines practical, step-by-step methods using common tools, while minimizing mess and keeping surfaces intact.
Below you’ll find a quick, actionable path to restoration, plus safety tips and common pitfalls to avoid. The focus stays on safe removal, effective cleanup, and preserving the wall finish for future use.
Quick Answer
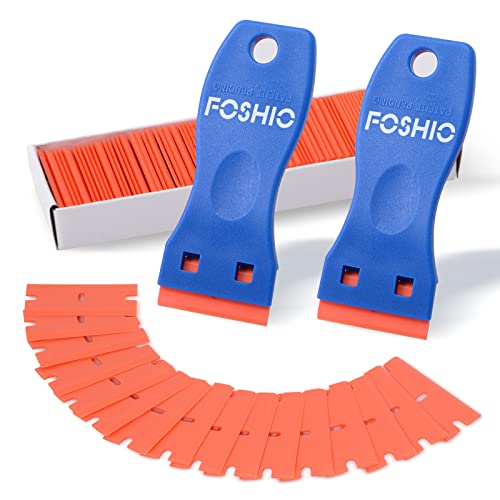
Gently scrape excess wax with a plastic wall scraper or rubber edge wall scraper 4 inch, soften with a heat gun for wax removal on walls on a low setting, then wipe with a microfiber cloth for wax removal wall cleaning until residue is gone. Finish by buffing with a clean cloth and inspecting for any remaining film.
What You’ll Need
- 3 inch plastic wall scraper putty knife
- wall wax removal scraper tool plastic blade
- heat gun for wax removal on walls
- microfiber cloth for wax removal wall cleaning
- rubber edge wall scraper 4 inch


Before You Start
Limit surface damage by testing a small, inconspicuous area first. Work in a well-ventilated space and protect floors with a drop cloth. For painted walls, avoid aggressive scrapes that could gouge the finish. Use the lowest effective heat setting on the heat gun to prevent blistering. Time estimates vary with wax thickness, typically 15–45 minutes for a small spill and longer for large areas.
Step-By-Step: How To Clean Wax Off Wall
- Place a protective cloth under the spill area to catch drips and prevent floor staining.
- Gently scrape excess wax with a plastic wall scraper putty knife or rubber edge wall scraper 4 inch held nearly flat to the wall. Use light, even strokes away from the wall texture.
- If wax is stubborn, warm the area with a heat gun for wax removal on walls set to a low temperature. Keep the nozzle moving and maintain several inches distance to avoid heat damage.
- Wipe softened wax with a microfiber cloth for wax removal wall cleaning, pressing gently to lift residue. Do not rub harshly on delicate finishes.
- For glossy spots or embedded wax, reheat briefly and continue lifting until the surface feels clean. Replace cloths when soiled to prevent re-depositing wax.
- Inspect the wall for any remaining film. If residue persists, repeat the scrape and wipe steps using a fresh portion of cloth.
- Once clean, wipe the area with a dry microfiber cloth to remove any moisture. Allow to air-dry completely before restoring décor or furniture nearby.
- If the wax left a faint smear, lightly dampen the cloth with water or a mild, non-abrasive cleaner and gently buff in a circular motion.
- For textured walls, work along the grain and corners with the 3 inch plastic wall scraper putty knife to reach crevices, keeping pressure light.
- After removal, recheck the wall under different lighting to confirm a uniform surface and no shiny patches indicating remaining wax.
- Dispose of used cloths and protective sheets properly to prevent re-contamination of walls or floors.
- Place a fresh protective surface nearby if planning additional touch-ups to maintain a clean workspace.
Troubleshooting
| Symptom | Likely Cause | Fix | Prevention |
|---|---|---|---|
| Wax residue remains after wiping | Heat insufficient or wax re-solidified | Reheat briefly and re-wipe with a clean cloth | Test spot heat level first; use gradual increments |
| Paint or wallpaper damaged | Scraping with excessive pressure | Switch to lighter pressure and plastic or rubber tools | Avoid metal blades; use soft tools |
| Shiny patch on wall | Wax smear or solvent residue | Light buff with microfiber; if needed, mild cleaner | Use minimal moisture and choose non-abrasive cleaners |
| Rough texture after removal | Abrasive wiping or aggressive scraping | Gentle, repetitive passes with clean tools | Work in small sections and check frequently |
Common Mistakes
- Using metal scrapers that gouge walls
- Overheating and scorching paint or wallpaper
- Rubbing wax deeper into texture with aggressive scrubbing
- Not testing a hidden area before full removal
- Forgetting to dry the wall, leaving water marks
Tips For Best Results
- Always work from the outer edges toward the center of the wax spill to minimize spreading.
- Work in small sections to maintain control and prevent wax from spreading to clean areas.
- Keep a damp cloth nearby to manage any solvent or residue quickly.
- Use the microfiber cloths in multiple clean passes to avoid re-depositing wax.
- Replace tools as they accumulate wax residue to maintain effective performance.
Call A Professional
Seek professional help if the wax covers a large area, penetrates porous wall finishes, or if paint or wallpaper shows signs of blistering or peeling. If the wall finish is unknown, or if high heat is required to soften wax, contact a painter or home restoration specialist. Stop and assess when fumes or smoke appear, or if wallpaper seams begin lifting.
FAQ
Is it safe to use heat on painted walls?
Yes, but use the lowest effective heat setting and keep the heat source moving to avoid damage.
Can I use soap and water to finish after wax removal?
Lightly dampening with water and mild cleaner is fine after wax is removed, then wipe dry.
Will wax damage wallpaper?
It can, especially if the wallpaper is delicate. Use gentle tools and test a small area first.
What tools are best for textured walls?
A plastic or rubber scraper with soft edges works best to avoid tearing or scratching texture.
Buying Guide
When choosing wax removal tools, consider size, material, and comfort. For walls, plastic blades and rubber-edged scrapers reduce the risk of surface damage. Look for ergonomically designed handles and blades that stay rigid but are gentle to the finish. A heat gun should offer adjustable temperature and a narrow nozzle to focus heat without broad exposure. A microfiber cloth is essential for buffing away residue without lint that can leave streaks. Finally, confirm compatibility with your wall type, whether painted, wallpapered, or textured, to ensure safe and effective cleaning. Would you benefit from having a compact toolkit for quick wax touch-ups or a more robust set for larger home projects?