Cleaning a GE dryer is essential for performance, efficiency, and safety. Regular maintenance helps prevent overheating, reduces energy use, and minimizes fire risk caused by lint buildup. This guide provides a practical, step-by-step approach tailored for GE models using common vent cleaning tools.
Follow these steps to remove lint, clear ducts, and inspect the vent system without damaging parts or voiding warranties. The focus is on accessible tools and safe procedures that work with the typical GE dryer configuration.
Quick Answer
What you’ll do: Disconnect power, clear the lint trap, use a vent cleaning brush set and flexible rods to reach the vent, inspect with a mirror, and reassemble. Run a test cycle to confirm airflow and dryness. Regular checks every 3–6 months keep GE dryers running efficiently.
What You’ll Need
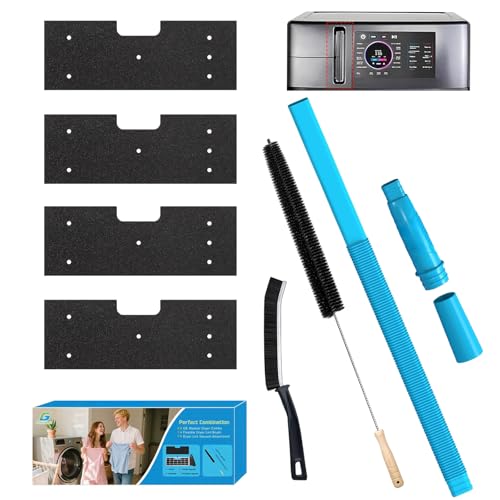
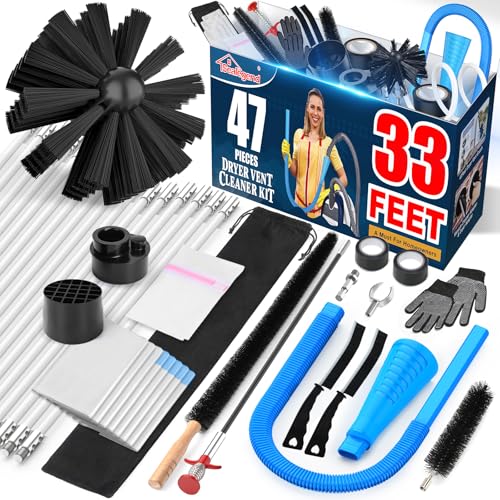
- GE dryer vent cleaning kit
- Lint trap brush for GE clothes dryer
- Dryer vent cleaning brush set with flexible rods
- Stainless steel dryer vent cleaning brush
- Dryer vent cleaning kit with inspection mirror

Before You Start
Safety first: unplug the dryer or switch off in-unit power at the breaker panel. Move the dryer away from the wall to access the vent connection. Have a sturdy ladder for ceiling or attic access if the vent runs long distances. Do not run the dryer with a blocked vent, as overheating can cause damage and fire.
Estimate your time: a typical cleaning takes 30–60 minutes, depending on vent length and accessibility. Check for any signs of damage such as crushed ducts or loose clamps and plan for replacement parts if needed.
Step-By-Step: How To Clean A GE Dryer
- Unplug the dryer and disconnect the vent hose from the back of the unit. Remove the lint trap and set aside for cleaning.
- Inspect the lint trap housing; wipe clean with a damp cloth to remove any residual lint or fabric softener buildup.
- Use the lint trap brush for GE clothes dryer to scrub the lint screen cavity and remove stubborn fibers.
- Attach the dryer vent cleaning brush set with flexible rods to a drill or manual handle. Gently insert into the vent hose, twisting to pull lint out.
- Extend the vent brush through sections of the vent run, working from the dryer toward the exterior. Periodically pull back and clean the brush to prevent fiber binding.
- Use the stainless steel dryer vent cleaning brush for stubborn clogs or tight bends, especially in long runs or elbows.
- If the vent route includes a hard-to-reach area, employ the dryer vent cleaning kit with inspection mirror to visually confirm clear passages and spot damage.
- Reassemble the vent hose, secure clamps, and replace the lint trap. Plug in the dryer and run a short air-blow cycle or a no-heat test to verify airflow.
- Inspect the exterior vent hood for proper opening and ensure the vent flap moves freely with airflow.
- Record cleaning date and note any repairs or parts needed for future maintenance.
- Schedule regular inspections every 3–6 months, or more frequently if the dryer experiences heavy use or has long vent runs.
- If you notice persistent poor drying or overheating, proceed to troubleshooting or seek professional help.
Troubleshooting
| Symptom | Likely Cause | Fix | Prevention |
|---|---|---|---|
| Dryer takes longer than usual to dry | Lint buildup in vent or inefficient airflow | Clean vent with brush set and inspect for kinks | Regular vent cleaning every 3–6 months |
| Lint at the vent exterior | Cracked or loose vent connections | Secure or replace damaged ducts and clamps | Inspect exterior vent on cool days; ensure flap opens fully |
| Odor or scorching smell | Overheating due to restricted airflow | Stop use, clean vent, check lint trap, and inspect for heat damage | Schedule annual professional checks if odors persist |
| Dryer stops mid-cycle | Electrical or vent blockage | Check power, inspect vent run, and clear blockages | Keep area around the dryer clear of clutter |
Common Mistakes
- Using metal tools that can damage the vent or housing; opt for the proper brushes.
- Forgetting to disconnect power before starting; always unplug the unit.
- Neglecting exterior vent cleaning, which can trap moisture and fibers outside the home.
- Over-tightening clamps, which may crush ducts and restrict airflow.
Tips For Best Results
- Work with sections: clean from the dryer toward the exterior in stages to manage lint more efficiently.
- Inspect for signs of lint buildup beyond the usual area, especially in elbows and long straight runs.
- Use stainless steel brushes for longevity and to resist corrosion from moisture in ducts.
- Keep a maintenance log that records dates, actions taken, and any parts replaced.
Call A Professional
Some situations require a pro: if you encounter continuous blockages, damaged ductwork, or a vent that does not fully open, stop and contact a licensed technician. Also seek help if you notice electrical burning smells, excessive heat, or the dryer fails to operate safely.
FAQ
How often should I clean my GE dryer vent?
Clean the vent every 3–6 months for typical use, and more often with heavy use or long vent runs.
Can I use a household vacuum to remove lint from the vent?
Vacuuming the exterior vent area is safe, but avoid forcing debris through long duct runs; use dedicated vent cleaning tools instead.
Is it safe to clean the vent with the dryer plugged in?
No. Always unplug the dryer before starting any vent cleaning work.
What if lint keeps accumulating near the lint trap after cleaning?
Check the full vent system for blockages beyond the trap area and inspect for compromised ducts or damaged seals.
Should I replace the vent if it’s old?
Old, crushed, or kinked ducts reduce airflow and warrant replacement with smooth, dry, properly sealed ducts.
Buying Guide
When choosing vent cleaning tools for GE dryers, consider size, compatibility, and reach. Look for stainless steel brushes and flexible rods that can navigate bends without shedding fibers. A cleaning kit with an inspection mirror aids in visual confirmation of clear passages. For homes with long or multiple vent runs, select a kit that includes extendable rods and a high-quality exterior vent brush. Noise, ease of use, and compatibility with standard household power are practical factors in a busy household. Finally, confirm that the kit includes attachments suitable for GE models to maximize effectiveness and prevent damage to ducts.